

Good silage is made in about three days of work and eaten for six months, so the mistakes you make in those three days stay in the pit. If you are searching for how to make corn silage (in Hindi, makka silage kaise banaye), the short answer is this: grow a silage hybrid, cut it when the kernel milkline is about halfway down and the whole plant holds roughly 30 to 35 percent dry matter, chop it fine enough to crack the grain and pack well, fill fast, pack hard, seal the same day, and then leave it alone while it ferments. This guide explains each step in plain language for dairy farmers with cows and buffaloes, using published research (Wiersma, Borreani, Kung, Khan and others, listed at the end) for the numbers, and marking clearly where the advice is our practical guidance for Indian conditions: chaff cutters, bunkers, bags, pits and hot summers.
How to make corn silage: what you are doing and why corn
Silage is fresh chopped fodder stored without air so that bacteria turn the plant’s natural sugars into lactic acid. The acid drops the pH and stops the microbes that rot feed. Nothing is added to “make” silage; you only create the right conditions: the right moisture, a tight pack, and no air. Corn (maize) is the easiest crop to ensile because it has plenty of sugar, a low buffering capacity and a grain-rich ear. Research summarised by Kung and co-workers shows corn silage reaches a final pH of about 3.7 to 4.0, lower than legumes at 4.3 to 5.0, which is why corn ferments reliably and why clostridia (the butyric acid, rancid-smell microbes) do not take over the way they can in wet legume silage.
Why corn for an Indian dairy?
- It fills the fodder gap. Green fodder runs short in peak summer and again in cold winter weeks. Silage gives you the same quality of fodder every day of the year (practical guidance).
- It brings energy and fibre together. Corn silage carries starch from the cob and digestible fibre from the stalk and leaf. Whole-plant crude protein is only about 6.7 to 10 percent in the studies we read, so you still need a protein source in the ration (see our ration balancing guide).
- It stores a lot in a small area. In the hot-summer trial by Khan and co-workers (2024), maize gave 12.6 to 17.0 tons of dry matter per hectare depending on the hybrid.
- It uses a crop you already know how to grow, and the same crop can be cut green for the pashu the day it is chopped.
The catch is that silage rewards discipline. A neat pit with the wrong moisture or a loose cover can lose a large share of the crop. If you want to know how much is lost where, read our guide to silage dry matter losses. This article is the “how to make it” half.
Choosing the hybrid and the planting density
Hybrid and maturity. Choose a hybrid that gives high whole-plant yield, a healthy leafy stalk and a good ear, rather than only the heaviest grain. In the tropical trial by Khan and co-workers (2024), six genotypes grown under the same management differed a lot: dry matter yield ranged from 12.6 to 17.0 tons per hectare, and silage starch from 27.9 to 36.7 percent. The best hybrid there also had a lower silage pH (3.7 against 4.10), more lactic acid (5.32 against 4.83 percent) and lower NDF (37.3 against 43.1 percent) than the local cultivar. Lesson: the hybrid matters as much as the day you harvest. Ask your seed dealer and your local agriculture university which hybrids are recommended for silage in your zone, and pick one whose maturity fits your sowing date, because you want the harvest to fall before the rains break or before the cold arrives (practical guidance).
Planting density. More plants per hectare gives more tonnage, but the research is not one-sided:
- Ferreira and co-workers (2014) planted two hybrids at 60,000, 70,000, 80,000 and 90,000 seeds per hectare on a large dairy farm. Planting density did not change dry matter, crude protein, NDF, ADF or starch concentration of the whole plant, and dry matter yield went up as density went up. They cautioned that this happened in a season with plenty of rain (719 mm), and that the effect under limited water is not known.
- The same paper reviews earlier work showing that very dense stands can mean more barren plants, a lower grain-to-stover ratio and more fibre, and can hurt yield in dry spells.
- Khan and co-workers (2024) used 66,000 plants per hectare in their tropical trial (75 cm between rows, 20 cm between plants).
Practical guidance for India: follow your seed company’s recommended population for the hybrid, do not go far above it on rain-fed or short-water land, and give the crop proper nitrogen and irrigation. Dense, hungry, thirsty corn gives tall stalks with little grain, and less grain means less energy in the silage.
Corn silage harvest stage: kernel milkline and whole-plant dry matter
This is the single most important decision. Cut too early and the crop is watery, has less yield and less starch, ferments badly and leaks effluent. Cut too late and the plant is dry, hard to pack, heats up and spoils at the face. Wiersma and co-workers (1993) tested the kernel milkline as a simple field tool, and Khan and co-workers (2024) checked whole-crop dry matter directly. Together they give a clear target.
| Stage | What you see on the cob | What research found |
|---|---|---|
| Soft dough | First dents just appearing on the kernels | Too early. Highest fibre, high crude protein but low yield and a watery crop. |
| Early dent | Dents on nearly all kernels | Whole-plant digestibility already good, but yield is still building. |
| 1/2 milkline | Break a kernel: the hard starch line sits halfway between the crown and the tip | Whole-plant yield reached its maximum by about this stage. Kernel DM about 60 percent. Start harvest here. |
| 3/4 milkline | Milkline three-quarters of the way down | Grain yield peaks. Kernel DM about 65 percent. Whole-plant DM still in the usable 30 to 40 percent range. Finish harvest here. |
| No milkline (black layer) | Milk line gone, kernel fully mature | Too late for most silage: drier, more fibre again, harder to pack. |
In the Wisconsin study (Wiersma 1993, four 85-day hybrids over three years), whole-plant DM sat inside the 30 to 40 percent range between 1/2 and 3/4 milkline; whole-plant NDF fell by an average of 7.6 percentage points from soft dough to 1/2 milkline; and whole-plant digestibility was highest between early dent and 3/4 milkline. The authors concluded that harvest between 1/2 and 3/4 milkline gave maximum yield with good quality and DM. In a separate on-farm study in Argentina (Ferreira 2014), 1/4 milkline matched 31.4 percent DM and 1/2 milkline matched 34.5 percent DM.
How to check the milkline in the field
- Walk the field in several places and pick 5 to 10 cobs from different plants, not only from the edge.
- Snap a cob in half and look at kernels from the middle of the cob.
- Snap a kernel, or run your thumbnail across it. A hard, yellow starch layer grows from the crown down toward the tip, with milky liquid below the line. Note where the line sits.
- Repeat every two to three days once kernels are dented, because things move fast: in Wiersma’s data whole-plant DM rose about 0.58 percentage points per day from 1/2 milkline to no milkline, and about 1.07 per day after a frost.
- Confirm with a real dry matter test (see the next box) before you book the chopper.
How to measure dry matter on the farm
Practical guidance: chop a handful of whole plant, weigh about 100 g on a kitchen scale, dry it in a microwave in short bursts (stir and re-weigh each time) until the weight stops dropping, and divide the dry weight by the fresh weight. Do it on a representative sample, not on one cob. A cheaper pre-check is the hand-squeeze test on chopped material: if water streams out it is too wet, if it springs back and the hand is barely damp it is close, and if it falls apart dry it is too dry. Use it only to decide when to take a proper DM sample.
Why those limits? Borreani and co-workers (2018) and Wiersma state that ensiling too wet (below about 30 percent DM) causes poor fermentation and seepage, and effluent is prevented in most cases above 35 percent DM, while forage drier than about 50 percent DM risks heat damage and mould. Kung and co-workers add that silage pH starts to rise again as DM goes beyond 40 to 45 percent, and drier silages are more porous and spoil faster when air enters.
Corn silage in a hot Indian summer: tropics notes
Most silage research comes from cool climates. The Khan study (BMC Plant Biology, 2024) is useful because it was done under hot summer conditions of the tropics, with temperatures that can reach 40 to 45 degrees Celsius. What it found:
- As the crop matured from 25 to 35 percent whole-crop DM, dry matter yield rose from 10.4 to 17.8 tons per hectare, starch rose from 29.1 to 35.0 percent, NDF fell from 48.8 to 38.5 percent and silage pH fell from 4.10 to 3.60.
- The authors recommend harvesting at 30 to 35 percent whole-crop DM, which in their trial fell at about 34 to 41 days after flowering. That day count is specific to their hybrids and season, so for your farm use the milkline and DM test, not the calendar.
- They also noted that ensiling a crop before full maturity can raise digestibility but causes more DM and effluent losses and a less stable fermentation.
Borreani and co-workers add that high temperature and wet conditions at harvest increase DM losses before the silo is sealed, with temperatures of up to 40 degrees Celsius reported in tropical regions, and that ensiling with delays or high heat is especially risky. The practical rules for a hot summer (our guidance):
- Chop in the cooler hours if you can, and have everything ready before the first load reaches the silo.
- Do not stop for the afternoon: an open, half-packed pit in 40-degree heat heats up quickly.
- Do not harvest wet crop right after rain if you can wait a day, since surface water lowers DM.
- Plan the pit size so the face moves fast enough when it is opened (see the bunker, bag and pit section below).
Chop length and kernel processing
Why chop? Chopping releases sugar, lets the pack get tight and removes air. A coarse, bulky chop traps air and leaves hollow spaces where yeast and mould grow. Kung and co-workers note that shorter chop and mechanical processing help increase packing density, especially in drier crop.
What length? There is no single number for every farm. Research on feeding corn silage compared theoretical lengths of cut from about 4 to 19 mm; typical commercial length in the United States is 19 to 26 mm when the harvester has a kernel processor (Grant and Ferraretto 2018). In the Khan laboratory work the crop was chopped at 0.5 to 1 cm. Particles longer than about 10 to 11 mm may take cows longer to chew and swallow, and coarse chop makes cows sort the ration at the manger.
Practical guidance for Indian farms: a forage harvester or a good chaff cutter, set to give pieces of roughly 1 to 2 cm (the range between the research values above) with the cob and grain cut or cracked, is a sound target. Check by squeezing a handful from the load: you should see no whole kernels and no long stalk pieces longer than your thumb.
Kernel processing. Whole kernels, especially from very mature corn, can pass through the cow without being digested. Grant and Ferraretto (2018) cite work in which cows ate more dry matter from processed corn silage than from unprocessed corn silage at the same cut length. Crack the grain with a processing harvester roller if you have one; with a chaff cutter, a finer cut and not letting the crop get too dry are your tools. The best check is the dung: whole grain in dung means the processing or the maturity needs fixing. Our silage quality check guide shows how to inspect silage by smell, colour and pH.
Filling and packing: the density that decides losses
Oxygen is the enemy. At the start the chopped plant is still alive and respires, using up the oxygen and making heat; Borreani and co-workers note that at 30 percent DM respiration is about 70 percent of the maximum and at 50 percent about 30 percent. Your job is to push that air out quickly and pack so little remains.
- Fill fast, in thin layers. Muck and Holmes found that density correlated most strongly with how thinly loads were spread, tractor weight, packing time per ton and DM content. Spread each load in thin layers and pack each layer before the next. Practical guidance: layers of about 15 cm are easy to pack by tractor or by trampling; thicker layers hide air.
- Pack with weight and time. A heavy tractor and enough passes matter more than speed. For small pits or bags without a tractor, trample with people, drums or a roller, working the corners and walls most.
- Keep deliveries matched to packing. A higher delivery rate to the silo reduces density, because packing cannot keep up. Do not chop faster than you can pack.
- Fill and seal within one to a few days (see sealing section).
| Research number | What it means for you |
|---|---|
| Minimum average bulk density about 705 kg per cubic metre (as-fed) for bunkers and piles (Holmes and Muck, cited by Borreani) | One cubic metre should hold at least about 0.7 ton of chopped crop. A 40 cubic metre pit should hold about 28 tons. |
| Dry matter loss fell by about 2.2 percentage points for every 50 kg per cubic metre increase in density (Ruppel, cited by Borreani) | Better packing pays back directly in crop saved. |
| Ideal DM range 30 to 40 percent keeps porosity (air space) low | Too dry material is porous even if you pack hard. |
| Top 5 to 10 cm can reach 45 to 60 degrees Celsius if left unpacked overnight in warm weather (Kung) | Pack and cover the same day. Do not leave a half-filled pit open overnight. |
To check your own density: weigh the crop that goes in (count loads and weigh a few) and divide by the volume of the filled silo (length x width x average height). If you are far below 0.7 ton per cubic metre, pack harder next time.
Covering and sealing the silage
Sealing is where many farms lose the top and sides. Borreani and co-workers show that without a cover, losses in the top half metre are large, and the top 25 cm under even a plastic sheet often has elevated losses. Feeding spoiled silage, even just 5 percent of ration DM, reduced intake and digestibility of the whole ration in one study they cite. Plastic and sealing steps:
- Seal quickly. Delaying sealing of low-density corn silage by 4 days led to DM losses of up to 11 percent in a laboratory study, and a one-day delay increased organic matter loss by 27.2 percent in the top 45 cm in a farm-scale study. A short delay of about 3 hours showed no ill effects.
- Use proper silage plastic, not a thin or holed sheet. Oxygen barrier films are now available and perform better than plain polyethylene; ask your supplier.
- Remove air under the plastic. Press the plastic down onto the surface so there are no air pockets.
- Overlap joints by at least 1.2 m and weigh them down well (Bolsen, cited by Borreani).
- Weigh the cover uniformly and heavily: tires touching each other, sand or soil bags in a dense pattern, so that wind cannot lift and “pump” air under the plastic. Pay special attention to the edges and the shoulders by the walls, where silage is most porous.
- Protect the plastic. Keep animals, dogs, birds and rodents off, and inspect it weekly. Patch holes with the right tape. Rats and punctures are a major hidden cause of top spoilage (practical guidance).
- Drain the rain water. Slope the surface so water runs off, and keep the sheet beyond the silo edge so rain does not run under it.
What happens during fermentation: the phases
Once the silo is sealed, the timeline is as follows. Day counts follow the research cited; on a hot Indian farm each phase tends to move faster, so treat them as a guide.
| Phase | Roughly when | What happens |
|---|---|---|
| 1. Respiration | First hours to a few days | The plant cells and aerobic microbes use the trapped oxygen and give off heat. Packing quality and quick sealing keep this short. Core temperature should stay within about 5 to 8 degrees Celsius above the temperature at filling when well packed and sealed immediately (Kung). |
| 2. Active fermentation | Days to a few weeks | Lactic acid bacteria turn sugars into lactic acid and some acetic acid. pH falls. Corn silage ends at about pH 3.7 to 4.0, with lactic acid typically 2 to 4 percent of DM. |
| 3. Stable storage | After the pH has dropped | The acid keeps the silage stable as long as air is excluded. The fermentation phase is thought to last 7 to 45 days, but Kung and co-workers note that fermentation continues for much longer in whole-plant corn. |
| 4. Starch maturing | Weeks to months | Starch becomes more digestible with storage time: research shows ruminal in vitro starch digestibility rose by about 5 to 10 percentage units within 45 days and again by a similar amount between 45 and 120 days, possibly reaching its maximum near 9 months. |
| 5. Feed-out | When you open it | Air enters at the face. Yeasts start, silage heats and spoils unless the face is removed fast enough. |
That fourth row is why we do not recommend opening the pit at day 10 just because fodder is short. Read the detailed discussion in our article on when to open silage.
Bunker, bag or pit: what suits an Indian farm
All three work if the silage is dry-matter right, chopped, packed hard and sealed. The choice is mostly about herd size, budget and how fast you will consume the face. The research gives one important guide: after you open the silo, air creeps into the face, so the face must advance faster than the spoilage. Borreani and Tabacco’s work for northern Italy suggests minimum feed-out rates of about 1.10 metres per week in winter and above 1.75 metres per week in summer for corn silage, and Holmes and Muck use feed-out rate and density to keep face loss below 3 percent. That is an Italian guide, not an Indian one, so we use it only as a direction: the hotter the weather, the faster the face must move.
| Type | Best for | Pros | Watch out for |
|---|---|---|---|
| Bunker (concrete or brick walls, open top) | Large herds and TMR farms | Large volume, tractor packing, easy filling and unloading | Big face to remove each week; shoulder spoilage; expensive plastic and tires |
| Silage bag | Medium herds, custom service from machine owners | Small face, no construction; easy to sell or move | Bag punctures by rats and dogs; needs a bagging machine; plastic cost |
| Trench or pit (lined with plastic) | Small and medium farms | Cheap; can be sized to your herd; trampling works | Water ingress in the monsoon; must be on high ground with drainage; collapse risk when digging out |
| Drums and small bags (practical guidance) | Households with 1 to 3 animals | Very small face; learn the method cheaply | Needs careful pressing and sealing; higher cost per kg |
Size the silo to your herd, not to your field
Here is a simple method (our practical arithmetic, using the 0.7 ton per cubic metre density above). Example only: replace the numbers with your own.
- Decide how many animals eat silage and how many kilograms per animal per day (see our silage feeding management guide). Suppose 10 cows at 15 kg each = 150 kg per day.
- Multiply by the days you want to feed. 150 kg x 180 days = 27,000 kg, or 27 tons.
- Divide by 0.7 ton per cubic metre. 27 / 0.7 = about 39 cubic metres of pit volume.
- Check the face. Weekly use = 150 kg x 7 = 1,050 kg, or 1.5 cubic metres. To move the face about 1.75 metres a week in summer, the face area should not be bigger than about 1.5 / 1.75 = 0.86 square metres. A narrow, deeper pit (for example about 1 m wide and 0.9 m face height) or a small bag fits; a wide bunker would move far too slowly.
The lesson for small farms: choose a narrow face and, if needed, two small pits instead of one large one, and open them one after the other.
21 to 30 day starting checklist
| When | What to do |
|---|---|
| Day -30 to -21 | Choose the hybrid and sowing date. Decide the silo type and size. Prepare the pit or bunker site: high ground, drainage, smooth walls. Book the chopper or fix the chaff cutter, blades and electricity or diesel. |
| Day -21 to -7 | Buy silage plastic (with extra for overlap), tires or sand bags, tape and a tarpaulin for emergencies. Arrange labour and a tractor or trampling team. Line the pit and check the walls. Start checking the milkline once kernels are dented. |
| Day -7 to -2 | Check milkline every two to three days. Take a DM sample. Set the harvest date for around 30 to 35 percent DM. Plan the weather: avoid a rain forecast. Service and sharpen the cutter. |
| Day -1 | Clean the pit. Lay the plastic. Gather everyone and write down who does what: cutting, carrying, spreading, packing, covering. |
| Day 0 (filling) | Chop to the right length, with the grain cracked. Spread in thin layers, pack each layer hard, work corners and walls. Keep records of loads and time. |
| Day 0 to 1 (sealing) | Fill above wall level in a gentle dome, press out air, fold the plastic over, overlap joints, weigh down the whole cover, edges first. Do this the same day if possible. |
| Day 2 to 7 | Check for holes, rodent damage and sinking. Patch immediately. Keep animals and children away. |
| Day 7 to 21 | Weekly inspection. Do not open. The silo will settle by itself. |
| Day 21 to 30 | The first fermentation is complete by now in most silos, but starch continues to improve with time (see the phases table). If you must open, open the smallest face, remove a fresh slice daily and re-cover. Smell and colour should be pleasantly sour, not rotten, and not mouldy. |
Common mistakes and how to fix them
| Mistake | What happens | Fix |
|---|---|---|
| Harvesting too early (milky, green) | Watery silage, seepage, sour or butyric smell, lower yield and starch | Wait for 1/2 milkline and 30 to 35 percent DM |
| Harvesting too late (dry, hard cob) | Hard to pack, heating, mould, low digestibility, whole grain in dung | Start at 1/2 milkline; finish by 3/4 milkline |
| Coarse chop, no kernel cracking | Air pockets, sorting, undigested grain | Fine chop, cracked kernels, check the dung |
| Thick layers, no tractor or too little packing | Low density, high losses | Thin layers, more weight and time, target about 0.7 ton per cubic metre |
| Filling over several days with the pit open | Heating and top spoilage | Fill in one or two days; cover each night if you cannot finish |
| Delayed or loose sealing | Large top and edge losses | Seal the same day, overlap, weigh down |
| Rain water entering | Spoiled wet patches and leakage | Slope, drain, extend the plastic beyond the walls |
| A pit too large for the herd | Face moves too slowly, spoilage in summer | Narrow face; split into two silos |
| Opening too early | Lower starch digestibility, unstable face | Plan a longer storage; read the guide on when to open |
Cost thinking: is corn silage worth it?
We do not quote one price per kg of silage, because costs vary by district and by who owns the machinery. Work it out for your own farm with this simple frame:
- Add up the costs: seed, fertiliser, irrigation, land use, harvester or chaff cutter hire, labour, diesel, plastic, tires or sand bags, and the share of the pit or bunker cost.
- Divide by tons of silage actually fed, not tons put in. The research shows losses are real: Borreani and co-workers show that immature crop silage lost about 9.7 percent against 4.5 percent for mature crop in one trial of large cereal piles, and that uncovered silage loses far more.
- Compare with your alternative: the price of purchased green fodder in the lean months, or the cost of extra concentrate to keep milk steady.
- Put a price on good practice. Extra plastic, a few more hours of packing and a DM test are cheap compared with a spoiled top layer or a poor-quality pit that cows refuse.
A silage pit usually pays off when you have a regular herd to feed, a fodder gap you currently buy through, and the discipline to follow the steps above. For a few animals, a small bag or pit may be more sensible than a big bunker.
For cows eating silage: what to add to the ration
Once the silage is made, the next job is feeding it well. Corn silage is acidic and rich in digestible starch, and when it is fed with a lot of grain the rumen can run low on pH, which shows up as loose dung, a fall in fat percentage and slow eating. Silage also does not supply every mineral and vitamin the ration needs. Below are two IMN Pyrophos products that dairy farmers commonly use in rations that include silage. Neither is a silage additive or inoculant: they are fed to the animal and do not make or improve silage in the pit. Silage quality comes from the steps above.
Rumenia is a dairy feed premix with trace minerals, rumen buffer, prebiotics, yeast extracts, probiotics and toxin binders. Silage-fed herds that are on a grain-heavy ration can use it to support rumen stability and fermentation. It goes in the concentrate or TMR at 2.5 to 3 kg per ton of feed, which is 2.5 to 3 g per kg of feed, so a cow eating 5 kg of feed gets 12.5 to 15 g a day. At the 25 kg pack price this works out to about Rs 2.8 to Rs 3.4 per animal per day. See our dairy feed premix guide for mixing and a 30-day trial plan.
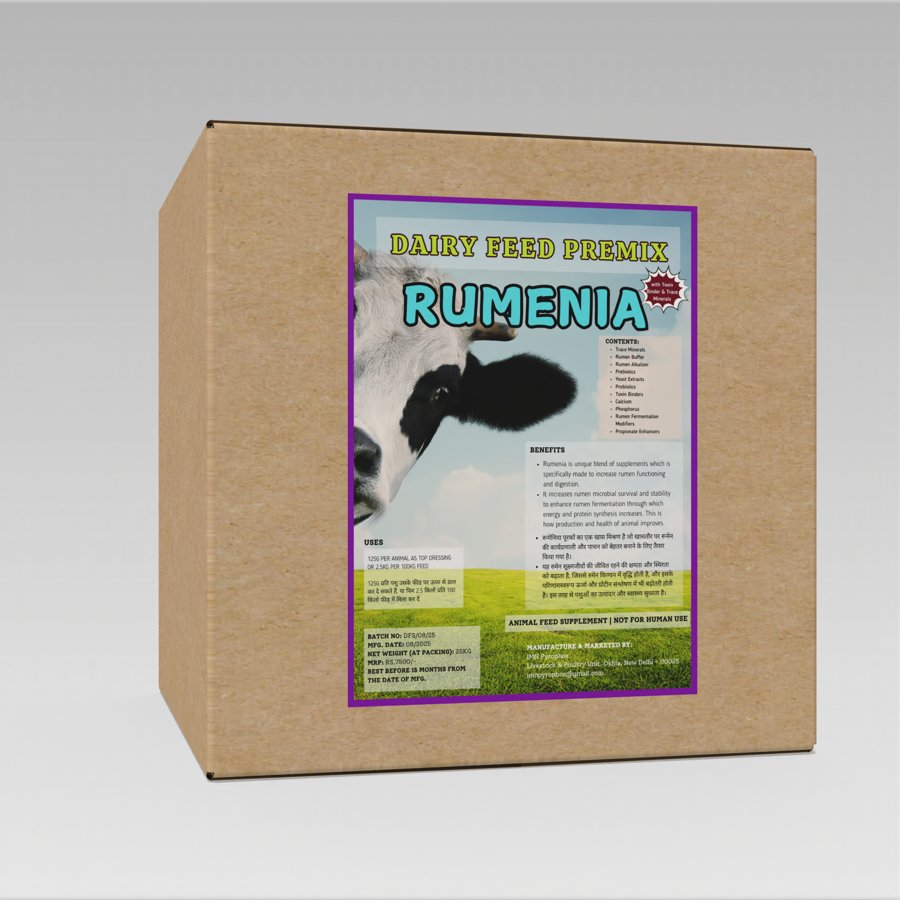
Dairy feed premix
Rumenia
Dairy feed premix with trace minerals, rumen buffer, prebiotics, yeast extracts, probiotics, toxin binders, calcium and phosphorus. Supports rumen function, microbe stability and fermentation, so energy and protein synthesis increase.
Dose: 2.5-3 kg per ton of feed (2.5-3 g per kg feed).
5 kg ₹1,400MRP ₹1,800 25 kg ₹5,625MRP ₹7,500
Pyrosach is a rumen-adapted live yeast (Saccharomyces cerevisiae, 10 billion CFU per gram). It supports rumen health and fibre digestion, helps with loose dung, and supports milk, fat and SNF. The dose is 8 to 10 g per adult cow or buffalo per day, mixed in feed and soaked overnight. It is useful where silage or a high-starch ration upsets dung. At the 1 kg price it comes to about Rs 5.6 to Rs 7 per animal per day.
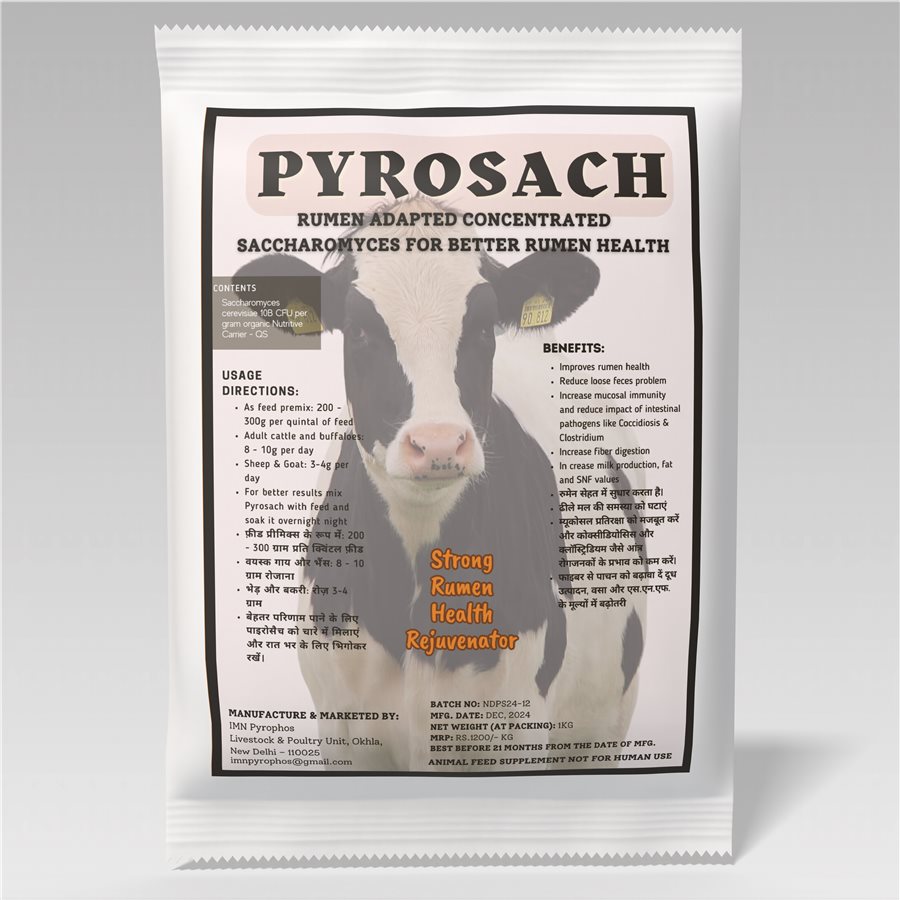
Rumen health
Pyrosach
Rumen-adapted Saccharomyces cerevisiae (10 billion CFU per gram). Improves fibre digestion and rumen health, reduces loose dung, and supports milk, fat and SNF.
Dose: 8-10 g per adult cow or buffalo per day. Mix with feed and soak overnight for best results.
1 kg ₹700MRP ₹1,200 5 kg ₹3,450
Do not stack products without advice: send your ration on WhatsApp first. For milk fat, see Acetomax and our milk fat guide. For the close-up period, see the negative DCAD premix guide. In winter buffalo rations, see increase buffalo milk in winter. And if you wonder about bacterial or enzyme products for the silage itself, read silage additives and inoculants: do they work?
Myths and facts about corn silage
- Myth: more grain in the cob always means better silage, so wait until the plant is dry. Fact: yield peaks around 1/2 milkline and whole-plant DM is best at 30 to 40 percent. Later corn is drier, harder to pack and spoils faster.
- Myth: any green maize can be ensiled. Fact: crop below about 30 percent DM ferments poorly and leaks, and over 50 percent DM can heat and mould.
- Myth: a bigger pit is better. Fact: a pit bigger than the herd needs means a slow face, and slow faces spoil in summer.
- Myth: silage plastic is only a sheet to keep rain out. Fact: it is the oxygen barrier. Joints, edges and weight matter as much as the film.
- Myth: you can open the pit after ten days. Fact: you can, but starch digestibility keeps improving for months.
- Myth: a rumen product fixes bad silage. Fact: nothing fed to the cow repairs silage that was made badly. Fix the steps first.
- Myth: if it smells strongly sour it is spoiled. Fact: good corn silage smells sharply sour or sweet-sour. Rancid butter, ammonia, or mouldy smells are the problem signs.
Frequently asked questions
How to make corn silage at home on a small farm?
Grow a silage-type maize, cut it at about the 1/2 milkline stage and 30 to 35 percent DM, chop it fine with the grain cracked, press it in thin layers into a lined pit or bag, seal it the same day with an airtight plastic, and weigh the cover down. Leave it closed for several weeks. Size the pit to your herd so the face moves quickly.
What is the best stage to harvest corn for silage?
Research supports harvesting between the 1/2 and 3/4 kernel milkline stage, when whole-plant dry matter is about 30 to 35 percent (up to 40 percent). At this point yield is at or near its maximum and digestibility is high.
How do I know the dry matter without a laboratory?
Use the microwave method: weigh a chopped sample, dry it in short bursts until the weight stops falling, and divide dry weight by fresh weight. The hand-squeeze test is only a rough pre-check. Do the test on a mixed sample from several places in the field.
What chop length is best for corn silage?
Research compared about 4 to 19 mm. For Indian farms we suggest about 1 to 2 cm with the grain cracked. Finer chop packs better, particularly in dry crop; too coarse makes cows sort and leaves air in the pit.
How long does corn silage take to ferment?
The main fermentation takes days to a few weeks, and the fermentation phase is thought to last 7 to 45 days. Fermentation and starch digestibility continue improving for months. See our guide on when to open silage.
How hard should I pack the pit?
Aim for at least about 705 kg of crop per cubic metre in bunkers and piles, according to the Holmes and Muck guideline cited by Borreani. Spread in thin layers, use the heaviest tractor you can, and pack for longer. In a small pit trample with people or a roller, especially the edges.
Can I add salt, molasses, urea or other things to the pit?
Corn usually has enough sugar of its own, and no additive replaces good packing. Our article on silage additives and inoculants explains when an inoculant has evidence behind it and when it does not.
Bunker, bag or pit: which is cheapest for 10 cows?
For a small herd a lined pit or silage bag with a narrow face is usually the most sensible. A big bunker has too wide a face for the daily feed use, and its face loses quality in summer.
Why is my corn silage hot, smelly or mouldy?
The most common causes are late sealing, loose packing, holes in the plastic, harvesting too dry, or a face that moves too slowly after opening. Read the silage quality check guide to identify the problem.
Which products can I feed with silage to support milk and rumen health?
These do not change the silage itself, but they support the cow eating it. Rumenia (dairy feed premix) and Pyrosach (live yeast) are two IMN Pyrophos options. Send your ration details on WhatsApp +91 98715 84101 and our team will advise.
Conclusion: how to make corn silage that you want to feed
To summarise how to make corn silage: pick a suitable hybrid and a sensible plant population, harvest at about 30 to 35 percent whole-plant DM (1/2 to 3/4 milkline), chop fine with the grain cracked, pack thin layers hard to at least about 0.7 ton per cubic metre, seal the same day and weigh the cover well, size the silo so the face moves fast, and wait before opening. Then feed it with a ration that also supplies protein, minerals and vitamins. Start with one small pit this season, write down every step, and improve it next year.
Sources used for the numbers in this article (research):
Wiersma DW et al. 1993. Kernel milkline stage and corn forage yield, quality and dry matter content. J Prod Agric 6:94-99. | Khan N et al. 2024. Influence of maize genotypes and harvest stages on in-silo fermentation quality and nutritional value of corn silage during hot summer conditions of the tropics. BMC Plant Biology 24:490. | Ferreira G et al. 2014. Effect of planting density on nutritional quality of green-chopped corn for silage. J Dairy Sci 97:5918-5921. | Borreani G et al. 2018. Silage review: Factors affecting dry matter and quality losses in silages. J Dairy Sci 101:3952-3979. | Kung L Jr et al. 2018. Silage review: Interpretation of chemical, microbial, and organoleptic components of silages. J Dairy Sci 101:4020-4033. | Grant RJ and Ferraretto LF 2018. Silage review: Silage feeding management. J Dairy Sci 101:4111-4121. Bunker, bag and pit comparisons, chop length for Indian chaff cutters, layer thickness, the silo sizing example and the hot-weather rules are practical guidance, not research.
Also read: Silage quality check · Silage losses · Silage additives · When to open silage · Silage feeding management · Balancing ration with corn silage · Dairy feed premix · IMN product guide
अच्छा साइलेज तीन दिन की मेहनत में बनता है और छह महीने तक खिलाया जाता है, इसलिए उन तीन दिनों की गलती पूरे सीज़न गड्ढे में पड़ी रहती है। अगर आप मक्का साइलेज कैसे बनाएँ (अंग्रेज़ी में how to make corn silage) खोज रहे हैं, तो छोटा जवाब यह है: साइलेज के लिए अच्छी hybrid उगाएँ, जब kernel की milkline लगभग आधी उतर जाए और पूरे पौधे में लगभग 30 से 35 प्रतिशत dry matter (DM) हो तब काटें, इतना बारीक chop करें कि दाना टूटे और pack अच्छा बने, जल्दी भरें, ज़ोर से दबाएँ, उसी दिन seal करें, और फिर fermentation होने दें। यह गाइड गाय और भैंस वाले डेयरी किसानों के लिए सरल भाषा में हर कदम समझाती है। संख्याएँ शोध-पत्रों से ली गई हैं (Wiersma, Borreani, Kung, Khan आदि, सूची अंत में), और जहाँ बात हमारी व्यावहारिक सलाह है (chaff cutter, bunker, bag, pit, गर्मी), वहाँ साफ़ लिखा है।
मक्का साइलेज कैसे बनाएँ: साइलेज क्या है और मक्का ही क्यों
साइलेज यानी हरा चारा काटकर बिना हवा के दबाना, ताकि lactic acid bacteria पौधे की शक्कर को lactic acid में बदल दें। एसिड से pH गिर जाता है और चारा सड़ाने वाले microbes रुक जाते हैं। साइलेज “बनाने” के लिए कुछ डालना नहीं पड़ता; बस सही हालात बनाने पड़ते हैं: सही नमी, कसा हुआ pack और हवा की रोकथाम। मक्का साइलेज के लिए सबसे आसान फसल है क्योंकि इसमें शक्कर अच्छी होती है, buffering capacity कम होती है और भुट्टे में दाना भरपूर होता है। Kung और साथियों की review के अनुसार मक्का साइलेज का final pH लगभग 3.7 से 4.0 आता है, जबकि legume साइलेज का 4.3 से 5.0। इसीलिए मक्का भरोसे से ferment होता है और गीली legume साइलेज की तरह butyric acid वाले (सड़े मक्खन जैसी बदबू) microbes नहीं चढ़ते।
भारतीय डेयरी के लिए मक्का क्यों?
- चारे की कमी भरता है। गर्मी में और सर्दी के कुछ हफ़्तों में हरा चारा कम पड़ता है। साइलेज से साल भर रोज़ एक जैसा चारा मिलता है (व्यावहारिक सलाह)।
- ऊर्जा और fibre दोनों देता है। मक्का साइलेज में भुट्टे का starch और तने-पत्ते का digestible fibre होता है। पर पूरे पौधे में crude protein सिर्फ़ 6.7 से 10 प्रतिशत के आसपास आया, इसलिए ration में protein का source अलग से चाहिए (हमारा ration balance गाइड देखें)।
- कम जगह में ज़्यादा चारा। Khan और साथियों के गर्म tropics trial (2024) में hybrid के हिसाब से 12.6 से 17.0 टन dry matter प्रति हेक्टेयर मिली।
- जो फसल आप पहले से उगाना जानते हैं, वही साइलेज बन जाती है।
पर साइलेज अनुशासन माँगता है। गलत नमी वाला या ढीला ढका गड्ढा फसल का बड़ा हिस्सा खराब कर सकता है। कहाँ कितना नुकसान होता है, यह साइलेज dry matter loss गाइड में है। यह लेख “कैसे बनाएँ” वाला हिस्सा है।
Hybrid और planting density कैसे चुनें
Hybrid और maturity। ऐसी hybrid लें जो पूरे पौधे की अच्छी yield, हरा-भरा तना और अच्छा भुट्टा दे, सिर्फ़ सबसे भारी दाना नहीं। Khan और साथियों (2024) के tropical trial में छह genotype एक जैसी देखभाल में उगाए गए और बहुत अलग निकले: dry matter yield 12.6 से 17.0 टन/हेक्टेयर और साइलेज starch 27.9 से 36.7 प्रतिशत। सबसे अच्छी hybrid में साइलेज pH कम (3.7 बनाम 4.10), lactic acid ज़्यादा (5.32 बनाम 4.83 प्रतिशत) और NDF कम (37.3 बनाम 43.1 प्रतिशत) था, local किस्म के मुकाबले। सबक: hybrid उतनी ही ज़रूरी है जितना काटने का दिन। अपने seed dealer और कृषि विज्ञान केंद्र से पूछें कि आपके zone में साइलेज के लिए कौन सी hybrid ठीक है, और ऐसी लें जिसकी maturity आपकी बुवाई की तारीख़ से बैठे, ताकि कटाई बारिश टूटने या सर्दी आने से पहले हो (व्यावहारिक सलाह)।
Planting density। ज़्यादा पौधे यानी ज़्यादा tonnage, पर शोध एकतरफ़ा नहीं है:
- Ferreira और साथियों (2014) ने एक बड़े डेयरी फ़ार्म पर दो hybrid 60,000, 70,000, 80,000 और 90,000 seeds/हेक्टेयर पर बोकर देखे। Density से पौधे का DM, crude protein, NDF, ADF और starch नहीं बदला, और DM yield density के साथ बढ़ी। पर यह अच्छी बारिश (719 mm) वाले साल में हुआ और पानी की कमी में असर अभी मालूम नहीं, यह उन्होंने खुद लिखा।
- उसी पेपर में पुराने शोध का ज़िक्र है कि बहुत घनी फसल में barren (बिना भुट्टे के) पौधे, कम grain-to-stover ratio और ज़्यादा fibre हो सकते हैं, और सूखे में yield गिर सकती है।
- Khan और साथियों (2024) ने 66,000 पौधे/हेक्टेयर (row से row 75 cm, पौधे से पौधे 20 cm) इस्तेमाल किए।
भारत के लिए व्यावहारिक सलाह: बीज कंपनी ने जो population बताई है वही रखें, बारानी या कम पानी वाली ज़मीन पर उससे बहुत ऊपर न जाएँ, और nitrogen व सिंचाई ठीक दें। घनी, भूखी, प्यासी मक्का लंबी पर बिना दाने वाली हो जाती है, और कम दाना यानी साइलेज में कम energy।
मक्का साइलेज harvest stage: kernel milkline और whole-plant DM
यह सबसे बड़ा फ़ैसला है। बहुत जल्दी काटा तो फसल पानी-पानी होगी, yield और starch कम होगा, fermentation बिगड़ेगा और seepage (पानी) निकलेगा। बहुत देर कर दी तो पौधा सूखा होगा, pack नहीं बनेगा, गर्म होगा और face पर खराब होगा। Wiersma और साथियों (1993) ने kernel milkline को खेत के लिए आसान tool के रूप में परखा, और Khan और साथियों (2024) ने सीधे whole-crop DM नापा। दोनों मिलकर साफ़ target देते हैं।
| Stage | भुट्टे पर क्या दिखता है | शोध क्या कहता है |
|---|---|---|
| Soft dough | दाने पर पहले dent अभी दिखने लगे | बहुत जल्दी। Fibre सबसे ज़्यादा, protein ज़्यादा पर yield कम और फसल पानी वाली। |
| Early dent | लगभग सब दानों पर dent | Digestibility पहले से अच्छी, पर yield अभी बढ़ रही है। |
| 1/2 milkline | दाना तोड़ें: कठोर starch की line crown और tip के बीच आधे रास्ते पर | पूरे पौधे की yield लगभग इसी stage तक max हो गई। Kernel DM लगभग 60 प्रतिशत। कटाई यहीं से शुरू करें। |
| 3/4 milkline | Milkline तीन-चौथाई नीचे | Grain yield peak पर। Kernel DM लगभग 65 प्रतिशत। पूरे पौधे का DM अभी 30 से 40 प्रतिशत में। कटाई यहाँ तक ख़त्म करें। |
| No milkline (black layer) | Milk line गायब, दाना पूरा पक गया | साइलेज के लिए अक्सर देर: सूखा, fibre फिर बढ़ता हुआ, pack करना मुश्किल। |
Wisconsin study (Wiersma 1993, चार 85-दिन की hybrid, तीन साल) में पूरे पौधे का DM 1/2 से 3/4 milkline के बीच 30 से 40 प्रतिशत में था; पूरे पौधे का NDF soft dough से 1/2 milkline तक औसतन 7.6 percentage point गिरा; और whole-plant digestibility early dent से 3/4 milkline के बीच सबसे ज़्यादा थी। लेखकों का निष्कर्ष था कि 1/2 से 3/4 milkline पर काटने से max yield, अच्छी quality और सही DM मिलता है। Argentina की एक अलग on-farm study (Ferreira 2014) में 1/4 milkline पर 31.4 प्रतिशत DM और 1/2 milkline पर 34.5 प्रतिशत DM मिला।
खेत में milkline कैसे check करें
- खेत में कई जगह घूमें और अलग-अलग पौधों से 5 से 10 भुट्टे तोड़ लें, सिर्फ़ मेड़ वाले नहीं।
- भुट्टे को बीच से तोड़ें और बीच के दाने देखें।
- एक दाना तोड़ें या नाखून से दबाएँ। कठोर पीला starch crown से tip की तरफ़ बढ़ता है, line के नीचे दूधिया तरल होता है। देखें line कहाँ है।
- जब दाने में dent आ जाए तो हर दो-तीन दिन में दोबारा देखें, क्योंकि सब तेज़ी से बदलता है: Wiersma के data में 1/2 milkline से no milkline तक पूरे पौधे का DM लगभग 0.58 percentage point प्रति दिन बढ़ा, और पाला (frost) पड़ने के बाद लगभग 1.07 प्रति दिन।
- Chopper बुलाने से पहले असली DM test से पक्का करें (अगला box)।
फ़ार्म पर dry matter कैसे नापें
व्यावहारिक सलाह: पूरे पौधे की एक मुट्ठी chop लें, kitchen scale पर लगभग 100 g तौलें, microwave में छोटे-छोटे round में सुखाएँ (हर बार हिलाएँ और दोबारा तौलें) जब तक वज़न गिरना बंद न हो, और सूखे वज़न को गीले वज़न से भाग दें। Sample कई जगह के पौधों का mixed हो, एक भुट्टे का नहीं। सस्ते pre-check के लिए hand-squeeze test: chop को मुट्ठी में दबाएँ, अगर पानी धार बनकर निकले तो बहुत गीला, अगर मुट्ठी खुलने पर chop वापस फूले और हाथ हल्का गीला हो तो पास है, और अगर सूखा बिखर जाए तो बहुत सूखा। इससे सिर्फ़ यह तय करें कि proper DM sample कब लेना है।
इन limit की वजह? Borreani और साथियों (2018) और Wiersma के अनुसार 30 प्रतिशत DM से कम पर साइलेज बनाने से खराब fermentation और seepage होता है, और 35 प्रतिशत DM से ऊपर ज़्यादातर seepage नहीं होता, जबकि लगभग 50 प्रतिशत DM से सूखे चारे में गर्मी से नुकसान और फफूंद का खतरा। Kung और साथी बताते हैं कि DM 40 से 45 प्रतिशत के ऊपर साइलेज pH फिर बढ़ने लगता है, और सूखे साइलेज ज़्यादा porous होते हैं और हवा लगते ही जल्दी खराब हो जाते हैं।
गर्मी में मक्का साइलेज: tropics के लिए ख़ास बातें
ज़्यादातर साइलेज शोध ठंडे देशों की है। Khan study (BMC Plant Biology, 2024) इसलिए काम की है कि वह tropics की गर्मी में हुई, जहाँ तापमान 40 से 45 डिग्री Celsius तक जाता है। क्या मिला:
- फसल 25 से 35 प्रतिशत whole-crop DM तक पकती गई तो dry matter yield 10.4 से 17.8 टन/हेक्टेयर, starch 29.1 से 35.0 प्रतिशत बढ़ा, NDF 48.8 से 38.5 प्रतिशत गिरा और साइलेज pH 4.10 से 3.60 हुआ।
- लेखक 30 से 35 प्रतिशत whole-crop DM पर काटने को कहते हैं, जो उनके trial में लगभग flowering के 34 से 41 दिन बाद था। ये दिन सिर्फ़ उनकी hybrid और season के हैं; आपके खेत में calendar नहीं, milkline और DM test देखें।
- उन्होंने यह भी लिखा कि पूरी maturity से पहले साइलेज बनाने से digestibility बढ़ सकती है पर DM और effluent का नुकसान ज़्यादा होता है और fermentation कम स्थिर रहता है।
Borreani और साथी जोड़ते हैं कि कटाई के समय ज़्यादा तापमान और गीली हालत silo seal होने से पहले ही DM loss बढ़ा देती है (tropics में 40 डिग्री Celsius तक का ज़िक्र), और देर से seal करना या गर्मी में भरना ज़्यादा risky है। गर्मी के व्यावहारिक नियम (हमारी सलाह):
- हो सके तो ठंडे घंटों में chop करें, और पहला load पहुँचने से पहले सब तैयार रखें।
- दोपहर में रुक न जाएँ: 40 डिग्री में आधा भरा खुला गड्ढा तेज़ी से गर्म होता है।
- बारिश के तुरंत बाद गीली फसल न काटें अगर एक दिन रुक सकते हैं, क्योंकि सतह का पानी DM कम कर देता है।
- गड्ढे का size ऐसा रखें कि खोलने पर face जल्दी आगे बढ़े (नीचे bunker, bag, pit section देखें)।
Chop length और kernel processing
Chop क्यों? Chop करने से शक्कर निकलती है, pack कसा बनता है और हवा निकलती है। मोटा, bulky chop हवा पकड़ता है और खाली जगह में yeast और फफूंद चढ़ती है। Kung और साथी बताते हैं कि छोटा chop और mechanical processing, ख़ासकर सूखी फसल में, packing density बढ़ाने में मदद करते हैं।
कितनी लंबाई? हर फ़ार्म के लिए एक नंबर नहीं है। गाय को खिलाने वाली शोध में लगभग 4 से 19 mm theoretical length of cut की तुलना हुई; अमेरिका में kernel processor वाले harvester के साथ आम तौर पर 19 से 26 mm चलता है (Grant और Ferraretto 2018)। Khan की laboratory में फसल 0.5 से 1 cm chop की गई। लगभग 10 से 11 mm से लंबे टुकड़े गाय को चबाने-निगलने में ज़्यादा समय लेते हैं, और मोटे chop से पशु manger पर ration छाँटने लगता है।
भारत के लिए व्यावहारिक सलाह: forage harvester या अच्छा chaff cutter, जो लगभग 1 से 2 cm के टुकड़े दे (ऊपर की शोध के बीच की range), भुट्टा और दाना कटा या टूटा हुआ, एक ठीक target है। Load से मुट्ठी उठाकर दबाएँ: पूरा दाना नहीं दिखना चाहिए और अँगूठे से लंबे तने के टुकड़े नहीं।
Kernel processing। पूरा दाना, ख़ासकर ज़्यादा पके मक्के का, पशु से बिना पचे निकल सकता है। Grant और Ferraretto (2018) एक ऐसी study का ज़िक्र करते हैं जिसमें उसी cut length पर processed corn silage में unprocessed से ज़्यादा DM intake मिला। अगर processing harvester का roller है तो दाना तोड़ें; chaff cutter में बारीक cut और फसल को ज़्यादा सूखा न होने देना ही उपाय है। सबसे अच्छी जाँच गोबर है: गोबर में पूरा दाना दिखे तो processing या maturity ठीक करें। Smell, colour और pH से साइलेज कैसे परखें, यह साइलेज quality check गाइड में है।
Filling और packing: density जो नुकसान तय करती है
Oxygen दुश्मन है। शुरू में कटा हुआ पौधा जीवित रहता है और साँस लेता है, oxygen खर्च करता है और गर्मी बनाता है; Borreani और साथी बताते हैं कि 30 प्रतिशत DM पर respiration max का लगभग 70 प्रतिशत और 50 प्रतिशत DM पर लगभग 30 प्रतिशत होता है। आपका काम हवा जल्दी निकालना और इतना कसा pack बनाना है कि हवा बचे ही नहीं।
- तेज़ी से, पतली परत में भरें। Muck और Holmes ने पाया कि density सबसे ज़्यादा इस बात से जुड़ी थी कि load कितनी पतली परत में फैलाए गए, tractor का वज़न, प्रति टन packing time और DM। हर load पतली परत में फैलाएँ और अगले से पहले दबाएँ। व्यावहारिक सलाह: लगभग 15 cm की परत tractor या पैरों से दबाना आसान है; मोटी परत में हवा छिप जाती है।
- वज़न और समय से दबाएँ। भारी tractor और काफ़ी चक्कर तेज़ी से ज़्यादा ज़रूरी हैं। छोटे गड्ढे या bag में tractor न हो तो लोग, drum या roller से दबाएँ, कोने और दीवार के पास ज़्यादा।
- Delivery और packing का मेल रखें। Silo में ज़्यादा तेज़ी से माल आना density कम करता है क्योंकि packing पीछे रह जाती है। Pack करने की रफ़्तार से तेज़ chop न करें।
- एक से कुछ दिन के अंदर भरें और seal करें (नीचे sealing section)।
| शोध की संख्या | आपके लिए मतलब |
|---|---|
| Bunker और pile के लिए minimum औसत bulk density लगभग 705 kg प्रति घन मीटर (as-fed) (Holmes और Muck, Borreani में) | एक घन मीटर में कम से कम लगभग 0.7 टन chop फसल आनी चाहिए। 40 घन मीटर के गड्ढे में लगभग 28 टन। |
| Density हर 50 kg/m3 बढ़ने पर DM loss लगभग 2.2 percentage point कम हुआ (Ruppel, Borreani में) | अच्छी packing सीधे बची फसल में वापस मिलती है। |
| 30 से 40 प्रतिशत DM पर porosity (हवा की जगह) कम रहती है | बहुत सूखी फसल कितना भी दबाओ porous रहती है। |
| गर्म मौसम में रात भर बिना दबाए छोड़ने पर ऊपर के 5 से 10 cm 45 से 60 डिग्री Celsius तक जा सकते हैं (Kung) | उसी दिन दबाएँ और ढकें। आधा भरा गड्ढा रात को खुला न छोड़ें। |
अपनी density जाँचने के लिए: जो फसल गई उसका वज़न (load गिनें और कुछ तौल लें) silo के volume (लंबाई x चौड़ाई x औसत ऊँचाई) से भाग दें। अगर 0.7 टन प्रति घन मीटर से काफ़ी कम आए तो अगली बार ज़्यादा दबाएँ।
साइलेज को ढकना और seal करना
कई फ़ार्म में ऊपर और किनारे यहीं खराब होते हैं। Borreani और साथी दिखाते हैं कि बिना cover के ऊपर के आधे मीटर में नुकसान बड़ा होता है, और plastic के नीचे भी ऊपर के 25 cm में अक्सर loss ज़्यादा मिलता है। उनके बताए एक अध्ययन में ration DM का सिर्फ़ 5 प्रतिशत भी खराब साइलेज होने पर पूरे ration का intake और digestibility गिरा। Plastic और sealing के कदम:
- जल्दी seal करें। कम density वाले मक्का साइलेज में seal 4 दिन लेट करने से laboratory study में DM loss 11 प्रतिशत तक गया, और farm-scale study में एक दिन की देर से ऊपर के 45 cm में organic matter loss 27.2 प्रतिशत बढ़ा। लगभग 3 घंटे की छोटी देर में कोई नुकसान नहीं दिखा।
- सही साइलेज plastic लें, पतली या छेद वाली sheet नहीं। Oxygen barrier film अब मिलती है और plain polyethylene से बेहतर काम करती है; supplier से पूछें।
- Plastic के नीचे से हवा निकालें। Plastic को सतह पर दबाएँ ताकि हवा के pocket न रहें।
- Joint कम से कम 1.2 m overlap करें और अच्छे से वज़न रखें (Bolsen, Borreani में)।
- Cover पर एक जैसा और भारी वज़न रखें: tyre एक-दूसरे से लगे हुए, रेत या मिट्टी की बोरी घनी, ताकि हवा plastic के नीचे “pump” न हो। किनारे और दीवार के पास के shoulders पर ख़ास ध्यान, वहाँ साइलेज सबसे porous होती है।
- Plastic को बचाएँ। पशु, कुत्ते, पक्षी और चूहे दूर रखें, हर हफ़्ते जाँचें। छेद हो तो सही tape से patch करें। चूहे और छेद ऊपर की खराबी का बड़ा छिपा कारण हैं (व्यावहारिक सलाह)।
- बारिश का पानी निकालें। सतह में ढलान रखें और plastic silo के किनारे से बाहर तक रखें ताकि पानी नीचे न घुसे।
Fermentation के phases: अंदर क्या होता है
Silo seal होने के बाद का समय-चार्ट नीचे है। दिन शोध के हिसाब से हैं; गर्म भारतीय फ़ार्म पर हर phase अक्सर तेज़ी से चलता है, इसलिए इसे मार्गदर्शक मानें।
| Phase | लगभग कब | क्या होता है |
|---|---|---|
| 1. Respiration | पहले कुछ घंटे से कुछ दिन | पौधे की cells और aerobic microbes फँसी हवा खर्च करते हैं और गर्मी देते हैं। अच्छी packing और तुरंत seal इसे छोटा रखते हैं। अच्छी तरह दबाने और तुरंत seal करने पर core का तापमान भरते समय के तापमान से लगभग 5 से 8 डिग्री Celsius से ज़्यादा नहीं बढ़ना चाहिए (Kung)। |
| 2. Active fermentation | दिन से कुछ हफ़्ते | Lactic acid bacteria शक्कर को lactic acid और थोड़ा acetic acid में बदलते हैं। pH गिरता है। मक्का साइलेज लगभग pH 3.7 से 4.0 पर रुकता है, lactic acid अक्सर DM का 2 से 4 प्रतिशत। |
| 3. Stable storage | pH गिर जाने के बाद | जब तक हवा बंद है एसिड साइलेज को स्थिर रखता है। Fermentation phase 7 से 45 दिन माना जाता है, पर Kung और साथी बताते हैं कि पूरे मक्के के पौधे में fermentation बहुत देर तक चलता रहता है। |
| 4. Starch का पकना | हफ़्ते से महीने | Storage के साथ starch ज़्यादा digestible होता है: शोध में ruminal in vitro starch digestibility 45 दिन में लगभग 5 से 10 percentage unit बढ़ी और 45 से 120 दिन के बीच फिर उतनी ही, और max लगभग 9 महीने के आसपास हो सकता है। |
| 5. Feed-out | जब आप खोलते हैं | Face पर हवा घुसती है। Yeast शुरू होती है, साइलेज गर्म होकर खराब होती है जब तक face काफ़ी तेज़ी से हटा न लिया जाए। |
चौथी row इसलिए है कि चारा कम होने पर भी हम दिन 10 पर गड्ढा खोलने की सलाह नहीं देते। विस्तार से साइलेज कब खोलें वाले लेख में पढ़ें।
Bunker, bag या pit: भारतीय फ़ार्म के लिए क्या सही
तीनों काम करते हैं अगर DM सही हो, chop हो, कसा pack हो और seal हो। चुनाव ज़्यादातर herd के size, budget और face कितनी तेज़ी से ख़त्म करेंगे, इस पर है। शोध एक ज़रूरी निर्देश देती है: खोलने के बाद face में हवा घुसती है, इसलिए face खराबी से तेज़ आगे बढ़ना चाहिए। Borreani और Tabacco का northern Italy का काम मक्का साइलेज के लिए सर्दी में लगभग 1.10 मीटर प्रति हफ़्ता और गर्मी में 1.75 मीटर प्रति हफ़्ता से ज़्यादा minimum feed-out rate सुझाता है, और Holmes और Muck face loss 3 प्रतिशत से नीचे रखने के लिए feed-out rate और density जोड़ते हैं। यह Italy का निर्देश है, भारत का नहीं, इसलिए हम इसे सिर्फ़ दिशा की तरह लेते हैं: जितनी गर्मी, उतना तेज़ face।
| Type | किसके लिए सही | फ़ायदे | ध्यान रखें |
|---|---|---|---|
| Bunker (दीवार वाला, ऊपर से खुला) | बड़े herd और TMR फ़ार्म | बड़ा volume, tractor से packing, भरना और निकालना आसान | हर हफ़्ते बड़ा face हटाना; shoulder की खराबी; plastic और tyre का खर्च |
| Silage bag | मध्यम herd, machine मालिक से custom service | छोटा face, निर्माण नहीं; हिलाना आसान | चूहे और कुत्तों से छेद; bagging machine चाहिए; plastic का खर्च |
| Trench या pit (plastic lined) | छोटे और मध्यम फ़ार्म | सस्ता; herd के हिसाब से size; पैरों से दबाना चलता है | बरसात में पानी; ऊँची ज़मीन और निकासी चाहिए; खोदते समय धँसने का खतरा |
| Drum और छोटे bag (व्यावहारिक सलाह) | 1 से 3 पशु वाले घर | बहुत छोटा face; कम खर्च में सीखना | दबाना और seal ध्यान से; प्रति kg लागत ज़्यादा |
Silo का size herd के हिसाब से रखें, खेत के हिसाब से नहीं
एक आसान तरीका (हमारा व्यावहारिक हिसाब, ऊपर की 0.7 टन प्रति घन मीटर density पर)। सिर्फ़ उदाहरण: अपने नंबर लगाएँ।
- तय करें कितने पशु साइलेज खाएँगे और प्रति पशु रोज़ कितने kg (साइलेज feeding management गाइड देखें)। मान लें 10 गाय x 15 kg = 150 kg रोज़।
- जितने दिन खिलाना है उतने से गुणा करें। 150 kg x 180 दिन = 27,000 kg, यानी 27 टन।
- 0.7 टन प्रति घन मीटर से भाग दें। 27 / 0.7 = लगभग 39 घन मीटर गड्ढे का volume।
- Face देखें। हफ़्ते का उपयोग = 150 kg x 7 = 1,050 kg, यानी 1.5 घन मीटर। गर्मी में face को लगभग 1.75 मीटर प्रति हफ़्ता आगे बढ़ाने के लिए face का क्षेत्रफल लगभग 1.5 / 1.75 = 0.86 वर्ग मीटर से ज़्यादा नहीं होना चाहिए। इसलिए पतला, गहरा गड्ढा (जैसे लगभग 1 m चौड़ा और 0.9 m face ऊँचाई) या छोटा bag ठीक है; चौड़ा bunker बहुत धीरे चलेगा।
छोटे फ़ार्म का सबक: पतला face चुनें, और ज़रूरत हो तो एक बड़े गड्ढे की जगह दो छोटे गड्ढे बनाएँ और एक के बाद एक खोलें।
21 से 30 दिन की शुरुआती checklist
| कब | क्या करें |
|---|---|
| दिन -30 से -21 | Hybrid और बुवाई की तारीख़ तय करें। Silo का type और size तय करें। गड्ढे या bunker की जगह तैयार करें: ऊँची ज़मीन, निकासी, चिकनी दीवार। Chopper book करें या chaff cutter, blade और बिजली या diesel पक्का करें। |
| दिन -21 से -7 | साइलेज plastic (overlap के लिए ज़्यादा), tyre या रेत की बोरी, tape और आपातकाल के लिए tarpaulin खरीदें। मज़दूर और tractor या दबाने वाली टीम का इंतज़ाम करें। गड्ढे को line करें और दीवारें जाँचें। दाने में dent आते ही milkline देखना शुरू करें। |
| दिन -7 से -2 | हर 2-3 दिन milkline देखें। DM sample लें। कटाई की तारीख़ लगभग 30 से 35 प्रतिशत DM पर रखें। मौसम देखें: बारिश के पूर्वानुमान में न काटें। Cutter की सर्विसिंग और धार करें। |
| दिन -1 | गड्ढा साफ़ करें। Plastic बिछाएँ। सबको बुलाकर लिख लें कौन क्या करेगा: कटाई, ढुलाई, फैलाना, दबाना, ढकना। |
| दिन 0 (भरना) | सही लंबाई में chop, दाना टूटा हुआ। पतली परत में फैलाएँ, हर परत कसकर दबाएँ, कोने और दीवार पर ध्यान। Load और समय का record रखें। |
| दिन 0 से 1 (seal) | दीवार से ऊपर हल्के गुंबद की तरह भरें, हवा दबाकर निकालें, plastic मोड़ें, joint overlap करें, पूरे cover पर वज़न रखें, पहले किनारे। हो सके तो उसी दिन। |
| दिन 2 से 7 | छेद, चूहे का नुकसान और धँसने की जाँच करें। तुरंत patch करें। पशु और बच्चों को दूर रखें। |
| दिन 7 से 21 | हर हफ़्ते निरीक्षण। खोलें नहीं। Silo अपने आप बैठ जाएगा। |
| दिन 21 से 30 | ज़्यादातर silo में पहला fermentation पूरा हो चुका होता है, पर starch समय के साथ और बेहतर होता है (phases table देखें)। खोलना ही पड़े तो सबसे छोटा face खोलें, रोज़ ताज़ी परत निकालें और दोबारा ढक दें। Smell और colour खट्टी-मीठी हो, सड़ी या फफूंद वाली नहीं। |
आम गलतियाँ और उनका उपाय
| गलती | क्या होता है | उपाय |
|---|---|---|
| बहुत जल्दी कटाई (दूधिया, हरी) | पानी वाली साइलेज, seepage, खट्टी या butyric बदबू, yield और starch कम | 1/2 milkline और 30 से 35 प्रतिशत DM का इंतज़ार करें |
| बहुत देर से कटाई (सूखा, कठोर भुट्टा) | Pack मुश्किल, गर्मी, फफूंद, कम digestibility, गोबर में पूरा दाना | 1/2 milkline पर शुरू, 3/4 milkline तक ख़त्म |
| मोटा chop, दाना टूटा नहीं | हवा के pocket, छाँटना, न पचा दाना | बारीक chop, टूटा दाना, गोबर जाँचें |
| मोटी परत, tractor नहीं या कम packing | कम density, ज़्यादा loss | पतली परत, ज़्यादा वज़न और समय, लक्ष्य लगभग 0.7 टन प्रति घन मीटर |
| कई दिन तक खुला गड्ढा भरना | गर्मी और ऊपर की खराबी | एक-दो दिन में भरें; पूरा न हो तो रोज़ रात को ढक दें |
| देर से या ढीला seal | ऊपर और किनारों पर बड़ा नुकसान | उसी दिन seal, overlap, वज़न |
| बारिश का पानी घुसना | गीली खराब जगह और रिसाव | ढलान, निकासी, plastic दीवार से बाहर तक |
| Herd के लिए बहुत बड़ा गड्ढा | Face धीरे चलता है, गर्मी में खराबी | पतला face; दो silo में बाँट दें |
| जल्दी खोलना | कम starch digestibility, अस्थिर face | ज़्यादा समय रखें; कब खोलें गाइड पढ़ें |
लागत का हिसाब: मक्का साइलेज फ़ायदे का है?
हम साइलेज के एक kg का दाम नहीं बताते, क्योंकि लागत ज़िले और machine के मालिक पर बदलती है। अपने फ़ार्म के लिए यह frame इस्तेमाल करें:
- खर्च जोड़ें: बीज, खाद, सिंचाई, ज़मीन, harvester या chaff cutter किराया, मज़दूरी, diesel, plastic, tyre या रेत बोरी, और गड्ढे या bunker का हिस्सा।
- जितनी साइलेज असल में खिलाई गई उसके tonnage से भाग दें, जितनी डाली उतनी से नहीं। शोध दिखाती है कि नुकसान असली है: Borreani और साथियों के बताए एक trial में बड़े cereal piles में कच्ची फसल की साइलेज में लगभग 9.7 प्रतिशत नुकसान हुआ जबकि पकी फसल में 4.5 प्रतिशत, और बिना cover वाली साइलेज में बहुत ज़्यादा।
- अपने विकल्प से तुलना करें: कमी के महीनों में खरीदे हरे चारे का दाम, या दूध स्थिर रखने के लिए ज़्यादा concentrate का खर्च।
- अच्छी practice की कीमत तय करें। ज़्यादा plastic, कुछ घंटे ज़्यादा packing और DM test का खर्च खराब ऊपरी परत या ऐसे गड्ढे से बहुत कम है जिसे गाय नहीं खाती।
साइलेज गड्ढा तब पैसा वसूल करता है जब आपके पास नियमित herd हो, चारे की कमी हो जिसे आप अभी खरीदकर पूरा करते हैं, और ऊपर के कदम follow करने का अनुशासन हो। कुछ पशुओं के लिए छोटा bag या गड्ढा बड़े bunker से समझदारी है।
साइलेज खिलाने वाली गाय के लिए ration में क्या जोड़ें
साइलेज बन गई तो अगला काम उसे अच्छे से खिलाना है। मक्का साइलेज खट्टी होती है और digestible starch से भरपूर, और ज़्यादा दाने के साथ खिलाने पर rumen का pH गिर सकता है, जो पतले गोबर, fat% गिरने और धीमे खाने में दिखता है। साइलेज हर mineral और vitamin भी पूरा नहीं देती। नीचे IMN Pyrophos के दो products हैं जो साइलेज वाले ration में डेयरी किसान अक्सर इस्तेमाल करते हैं। दोनों में से कोई साइलेज additive या inoculant नहीं है: ये पशु को खिलाए जाते हैं, गड्ढे में साइलेज को बनाते या सुधारते नहीं। साइलेज की quality ऊपर के कदमों से आती है।
Rumenia डेयरी फ़ीड प्रीमिक्स है जिसमें trace minerals, rumen buffer, prebiotics, yeast extracts, probiotics और toxin binders हैं। जिन herd में साइलेज के साथ ज़्यादा दाना है, वहाँ यह rumen stability और fermentation को सहारा देने के लिए इस्तेमाल होता है। यह concentrate या TMR में 2.5 से 3 kg प्रति टन फ़ीड (2.5 से 3 g प्रति kg फ़ीड) मिलाया जाता है, यानी 5 kg फ़ीड खाने वाली गाय को 12.5 से 15 g रोज़। 25 kg pack के दाम पर यह लगभग Rs 2.8 से Rs 3.4 प्रति पशु प्रति दिन आता है। Mixing और 30 दिन के trial plan के लिए हमारा डेयरी फ़ीड प्रीमिक्स गाइड देखें।
डेयरी फीड प्रीमिक्स · बेस्टसेलर
Rumenia
Trace minerals, rumen buffer, prebiotics, yeast extracts, probiotics, toxin binders, कैल्शियम और फॉस्फोरस वाला डेयरी फीड प्रीमिक्स। rumen का काम, microbes की स्थिरता और fermentation बढ़ाता है, जिससे ऊर्जा और प्रोटीन का संश्लेषण बढ़ता है।
मात्रा: 2.5-3 किलो प्रति टन फ़ीड (2.5-3 ग्राम प्रति किलो फ़ीड)।
5 kg ₹1,400 · 25 kg ₹5,625MRP ₹1,800 / ₹7,500
Pyrosach rumen-adapted live yeast है (Saccharomyces cerevisiae, 10 billion CFU प्रति ग्राम)। यह rumen health और fibre digestion में मदद करता है, पतले गोबर में सहारा देता है और दूध, fat और SNF को support करता है। मात्रा adult गाय या भैंस को 8 से 10 g रोज़ है, फ़ीड में मिलाकर रात भर भिगो दें। जहाँ साइलेज या ज़्यादा starch वाले ration से गोबर बिगड़ता है वहाँ यह काम आता है। 1 kg के दाम पर यह लगभग Rs 5.6 से Rs 7 प्रति पशु प्रति दिन आता है।
रुमेन की सेहत
Pyrosach
रुमेन के अनुकूल Saccharomyces cerevisiae (1000 करोड़ CFU प्रति ग्राम)। रेशे का पाचन और रुमेन की सेहत सुधारता है, पतला गोबर घटाता है, दूध, फैट और SNF में सहायक।
मात्रा: 8–10 ग्राम प्रति वयस्क गाय या भैंस प्रति दिन, या 200–300 ग्राम प्रति क्विंटल दाना। अच्छे नतीजे के लिए दाने में मिलाकर रात भर भिगोएँ।
1 kg ₹700MRP ₹1,200
बिना सलाह के products को एक के ऊपर एक न जोड़ें: पहले अपना ration WhatsApp पर भेजें। Milk fat के लिए Acetomax और milk fat गाइड देखें। ब्याने से पहले के समय के लिए negative DCAD premix गाइड देखें। सर्दी में भैंस के ration के लिए भैंस का दूध सर्दी में कैसे बढ़ाएँ पढ़ें। और साइलेज के लिए bacteria या enzyme products के बारे में सोच रहे हों तो साइलेज additives और inoculants: काम करते हैं या नहीं? पढ़ें।
मक्का साइलेज के myths और facts
- Myth: भुट्टे में जितना ज़्यादा दाना, उतनी अच्छी साइलेज, इसलिए पौधा सूखने तक रुको। Fact: yield 1/2 milkline के आसपास peak होती है और पूरे पौधे का DM 30 से 40 प्रतिशत पर best है। देर वाली मक्का सूखी, pack करने में मुश्किल और जल्दी खराब होती है।
- Myth: कोई भी हरी मक्का साइलेज बन सकती है। Fact: लगभग 30 प्रतिशत DM से कम फसल खराब ferment होती है और बहने लगती है, और 50 प्रतिशत DM से ऊपर गर्म और फफूंद वाली हो सकती है।
- Myth: बड़ा गड्ढा बेहतर है। Fact: herd की ज़रूरत से बड़ा गड्ढा यानी धीमा face, और धीमे face गर्मी में खराब होते हैं।
- Myth: साइलेज plastic बस बारिश रोकने की चादर है। Fact: वह oxygen की दीवार है। Joint, किनारे और वज़न film जितने ही ज़रूरी हैं।
- Myth: दस दिन बाद गड्ढा खोल सकते हैं। Fact: खोल सकते हैं, पर starch digestibility महीनों तक बढ़ती रहती है।
- Myth: कोई rumen product खराब साइलेज ठीक कर देता है। Fact: पशु को खिलाया गया कुछ भी गलत बनी साइलेज को ठीक नहीं करता। पहले कदम सुधारें।
- Myth: तेज़ खट्टी smell यानी साइलेज खराब। Fact: अच्छी मक्का साइलेज की smell तेज़ खट्टी या मीठी-खट्टी होती है। सड़ा मक्खन, ammonia या फफूंद जैसी बदबू समस्या के संकेत हैं।
अक्सर पूछे जाने वाले सवाल
छोटे फ़ार्म पर घर में मक्का साइलेज कैसे बनाएँ?
साइलेज वाली मक्का उगाएँ, लगभग 1/2 milkline और 30 से 35 प्रतिशत DM पर काटें, दाना टूटे ऐसा बारीक chop करें, plastic लगे गड्ढे या bag में पतली परत में दबाएँ, उसी दिन airtight plastic से seal करें और cover पर वज़न रखें। कई हफ़्ते बंद रखें। गड्ढे का size herd के हिसाब से रखें ताकि face तेज़ चले।
साइलेज के लिए मक्का काटने का best stage कौन सा है?
शोध 1/2 से 3/4 kernel milkline के बीच काटने को support करती है, जब पूरे पौधे का dry matter लगभग 30 से 35 प्रतिशत (40 प्रतिशत तक) होता है। इस समय yield max के पास और digestibility अच्छी होती है।
Laboratory के बिना dry matter कैसे पता करें?
Microwave method: chop sample तौलें, छोटे round में सुखाएँ जब तक वज़न गिरना बंद हो, सूखे वज़न को गीले से भाग दें। Hand-squeeze test सिर्फ़ मोटा pre-check है। Test खेत की कई जगह के mixed sample पर करें।
मक्का साइलेज के लिए कितनी chop length ठीक है?
शोध में लगभग 4 से 19 mm की तुलना हुई। भारत के फ़ार्म के लिए हम दाना टूटे हुए लगभग 1 से 2 cm सुझाते हैं। बारीक chop, ख़ासकर सूखी फसल में, बेहतर pack होता है; बहुत मोटे chop में पशु छाँटता है और गड्ढे में हवा रहती है।
मक्का साइलेज को ferment होने में कितना समय लगता है?
मुख्य fermentation दिन से कुछ हफ़्ते में होता है, और fermentation phase 7 से 45 दिन माना जाता है। Fermentation और starch digestibility महीनों तक सुधरते रहते हैं। साइलेज कब खोलें गाइड देखें।
गड्ढे को कितना कसकर दबाएँ?
Borreani में दी Holmes और Muck guideline के अनुसार bunker और pile में कम से कम लगभग 705 kg फसल प्रति घन मीटर। पतली परत, जितना भारी tractor मिले, और ज़्यादा समय। छोटे गड्ढे में लोग या roller से, ख़ासकर किनारे।
क्या गड्ढे में नमक, गुड़, यूरिया या कुछ और डाल सकते हैं?
मक्का में अक्सर अपनी शक्कर काफ़ी होती है, और कोई additive अच्छी packing की जगह नहीं लेता। Inoculant कब evidence के साथ काम करता है, यह साइलेज additives और inoculants लेख में है।
10 गाय के लिए bunker, bag या pit: कौन सस्ता है?
छोटे herd के लिए पतले face वाला lined pit या silage bag अक्सर सबसे समझदार है। बड़े bunker का face रोज़ के उपयोग के हिसाब से बहुत चौड़ा होता है और गर्मी में उसकी quality गिरती है।
मेरी मक्का साइलेज गर्म, बदबूदार या फफूंद वाली क्यों है?
सबसे आम कारण: देर से seal, ढीली packing, plastic में छेद, बहुत सूखी कटाई, या खोलने के बाद face का धीरे चलना। साइलेज quality check गाइड पढ़कर समस्या पहचानें।
साइलेज के साथ दूध और rumen support के लिए क्या खिला सकते हैं?
ये साइलेज को नहीं बदलते, पर उसे खाने वाली गाय को सहारा देते हैं। Rumenia (डेयरी फ़ीड प्रीमिक्स) और Pyrosach (live yeast) IMN Pyrophos के दो विकल्प हैं। अपने ration की जानकारी WhatsApp +91 98715 84101 पर भेजें, हमारी टीम सलाह देगी।
निष्कर्ष: ऐसी मक्का साइलेज बनाएँ जो खिलाने का मन करे
मक्का साइलेज कैसे बनाएँ, संक्षेप में: सही hybrid और समझदार पौधा population, लगभग 30 से 35 प्रतिशत whole-plant DM (1/2 से 3/4 milkline) पर कटाई, दाना टूटा बारीक chop, पतली परत में कम से कम लगभग 0.7 टन प्रति घन मीटर दबाना, उसी दिन seal और cover पर अच्छा वज़न, silo का size ऐसा कि face तेज़ चले, और खोलने से पहले इंतज़ार। फिर इसे ऐसे ration के साथ खिलाएँ जिसमें protein, mineral और vitamin भी पूरे हों। इस season एक छोटा गड्ढा शुरू करें, हर कदम लिखें और अगले साल सुधारें।
Sources (शोध, जहाँ से संख्याएँ ली गईं):
Wiersma DW et al. 1993. Kernel milkline stage and corn forage yield, quality and dry matter content. J Prod Agric 6:94-99. | Khan N et al. 2024. Influence of maize genotypes and harvest stages on in-silo fermentation quality and nutritional value of corn silage during hot summer condition of the tropics. BMC Plant Biology 24:490. | Ferreira G et al. 2014. Effect of planting density on nutritional quality of green-chopped corn for silage. J Dairy Sci 97:5918-5921. | Borreani G et al. 2018. Silage review: Factors affecting dry matter and quality losses in silages. J Dairy Sci 101:3952-3979. | Kung L Jr et al. 2018. Silage review: Interpretation of chemical, microbial, and organoleptic components of silages. J Dairy Sci 101:4020-4033. | Grant RJ और Ferraretto LF 2018. Silage review: Silage feeding management. J Dairy Sci 101:4111-4121. Bunker, bag और pit की तुलना, chaff cutter के लिए chop length, परत की मोटाई, silo sizing का उदाहरण और गर्मी के नियम व्यावहारिक सलाह हैं, शोध नहीं।
यह भी पढ़ें: साइलेज quality check · साइलेज losses · साइलेज additives · साइलेज कब खोलें · साइलेज feeding management · मक्का साइलेज के साथ ration balance · डेयरी फ़ीड प्रीमिक्स · IMN product guide
Achha silage teen din ki mehnat me banta hai aur chhe mahine tak khilaya jaata hai, isliye un teen dinon ki galti poore season pit me padi rehti hai. Agar aap makka silage kaise banaye (English me how to make corn silage) search kar rahe hain, to chhota jawab ye hai: silage ke liye achhi hybrid ugayein, jab kernel ki milkline lagbhag aadhi utar jaye aur poore paudhe me lagbhag 30 se 35 percent dry matter (DM) ho tab kaatein, itna baarik chop karein ki daana toote aur pack achha bane, jaldi bharein, zor se dabayein, usi din seal karein, aur phir fermentation hone dein. Ye guide cow aur buffalo wale dairy farmers ke liye saaf bhasha me har step samjhati hai. Sankhya (numbers) research paper se li gayi hain (Wiersma, Borreani, Kung, Khan aadi, list aakhir me), aur jahan baat hamari practical salah hai (chaff cutter, bunker, bag, pit, garmi), wahan saaf likha hai.
Makka silage kaise banaye: silage kya hai aur makka hi kyon
Silage matlab hara chaara kaatkar bina hawa ke dabana, taaki lactic acid bacteria paudhe ki sugar ko lactic acid me badal dein. Acid se pH gir jaata hai aur chaara sadne wale microbes ruk jaate hain. Silage “banane” ke liye kuch daalna nahi padta; bas sahi halat banani padti hai: sahi nami, kasa hua pack aur hawa ki roktham. Makka silage ke liye sabse aasan fasal hai kyunki isme sugar achhi hoti hai, buffering capacity kam hoti hai aur cob me daana bharpoor hota hai. Kung aur saathiyon ki review ke mutabik makka silage ka final pH lagbhag 3.7 se 4.0 aata hai, jabki legume silage ka 4.3 se 5.0. Isiliye makka bharosemand tareeke se ferment hota hai aur gili legume silage ki tarah butyric acid wale (sadi makkhan jaisi badboo) microbes nahi chadhte.
Indian dairy ke liye makka kyon?
- Chaare ki kami bharta hai. Garmi me aur sardi ke kuch hafton me hara chaara kam padta hai. Silage se saal bhar roz ek jaisa chaara milta hai (practical salah).
- Urja aur fibre dono deta hai. Makka silage me cob ka starch aur tane-patte ka digestible fibre hota hai. Par poore paudhe me crude protein sirf 6.7 se 10 percent ke aaspaas aaya, isliye ration me protein ka source alag se chahiye (hamara ration balance guide dekhein).
- Kam jagah me zyada chaara. Khan aur saathiyon ke garmi wale tropics trial (2024) me hybrid ke hisaab se 12.6 se 17.0 ton dry matter prati hectare mili.
- Jo fasal aap pehle se ugana jaante hain, wahi silage ban jaati hai.
Par silage anushasan maangta hai. Galat nami wala ya dheela dhaka pit fasal ka bada hissa kharab kar sakta hai. Kahan kitna nuksan hota hai, ye silage dry matter loss guide me hai. Ye article “kaise banayein” wala hissa hai.
Hybrid aur planting density kaise chunein
Hybrid aur maturity. Aisi hybrid lein jo poore paudhe ki achhi yield, hara-bhara tana aur achha cob de, sirf sabse bhaari daana nahi. Khan aur saathiyon (2024) ke tropical trial me chhe genotype ek jaisi dekhbhal me ugaye gaye aur bahut alag nikle: dry matter yield 12.6 se 17.0 ton/ha aur silage starch 27.9 se 36.7 percent. Sabse achhi hybrid me silage pH kam (3.7 vs 4.10), lactic acid zyada (5.32 vs 4.83 percent) aur NDF kam (37.3 vs 43.1 percent) tha, local variety ke muqable. Sabak: hybrid utni hi zaroori hai jitna kaatne ka din. Apne seed dealer aur krishi vigyan kendra se poochhein ki aapke zone me silage ke liye kaun si hybrid theek hai, aur aisi lein jiski maturity aapki buwai ki tareekh se baithe, taaki katai barish tootne ya sardi aane se pehle ho jaye (practical salah).
Planting density. Zyada paudhe matlab zyada tonnage, par research ek tarfa nahi hai:
- Ferreira aur saathiyon (2014) ne ek bade dairy farm par do hybrid 60,000, 70,000, 80,000 aur 90,000 seeds/ha par bo kar dekhe. Density se paudhe ka DM, crude protein, NDF, ADF aur starch nahi badla, aur DM yield density ke saath badhi. Par ye achhi barish (719 mm) wale saal me hua aur paani ki kami me asar abhi maaloom nahi, ye unhone khud likha.
- Usi paper me purani research ka zikr hai ki bahut ghani fasal me barren (bina cob) paudhe, kam grain-to-stover ratio aur zyada fibre ho sakte hain, aur sukhe me yield gir sakti hai.
- Khan aur saathiyon (2024) ne 66,000 paudhe/ha (row se row 75 cm, paudhe se paudhe 20 cm) use kiye.
Bharat ke liye practical salah: beej company ne jo population batayi hai wahi rakhein, barani ya kam paani wali zameen par usse bahut upar na jayein, aur nitrogen aur sinchai theek dein. Ghani, bhookhi, pyasi makka lambi par bina daane wali ho jaati hai, aur kam daana matlab silage me kam energy.
Makka silage harvest stage: kernel milkline aur whole-plant DM
Ye sabse bada faisla hai. Bahut jaldi kaate to fasal paani-paani hogi, yield aur starch kam hoga, fermentation bigdega aur seepage (paani) nikalega. Bahut der kar di to paudha sukha hoga, pack nahi banega, garam hoga aur face par kharab hoga. Wiersma aur saathiyon (1993) ne kernel milkline ko khet ke liye aasan tool ke roop me parkha, aur Khan aur saathiyon (2024) ne seedhe whole-crop DM naapa. Dono milkar saaf target dete hain.
| Stage | Cob par kya dikhta hai | Research kya kehti hai |
|---|---|---|
| Soft dough | Daane par pehle dent abhi dikhne lage | Bahut jaldi. Fibre sabse zyada, protein zyada par yield kam aur fasal paani wali. |
| Early dent | Lagbhag sab daano par dent | Digestibility pehle se achhi, par yield abhi badh rahi hai. |
| 1/2 milkline | Daana todein: kathor starch ki line crown aur tip ke beech aadhe raste par | Poore paudhe ki yield lagbhag isi stage tak max ho gayi. Kernel DM lagbhag 60 percent. Katai yahin se shuru karein. |
| 3/4 milkline | Milkline teen-chauthai neeche | Grain yield peak par. Kernel DM lagbhag 65 percent. Poore paudhe ka DM abhi 30 se 40 percent me. Katai yahan tak khatam karein. |
| No milkline (black layer) | Milk line gayab, daana poora pak gaya | Silage ke liye aksar der: sukha, fibre phir badhta hua, pack karna mushkil. |
Wisconsin study (Wiersma 1993, chaar 85-din ki hybrid, teen saal) me poore paudhe ka DM 1/2 se 3/4 milkline ke beech 30 se 40 percent me tha; poore paudhe ka NDF soft dough se 1/2 milkline tak ausat 7.6 percentage point gira; aur whole-plant digestibility early dent se 3/4 milkline ke beech sabse zyada thi. Lekhakon ne nishkarsh nikala ki 1/2 se 3/4 milkline par katne se max yield, achhi quality aur sahi DM milta hai. Argentina ke ek alag on-farm study (Ferreira 2014) me 1/4 milkline par 31.4 percent DM aur 1/2 milkline par 34.5 percent DM mila.
Khet me milkline kaise check karein
- Khet me kai jagah ghoomein aur alag-alag paudhon se 5 se 10 cob tod lein, sirf medh wale nahi.
- Cob ko beech se todein aur beech ke daane dekhein.
- Ek daana todein ya nakhun se dabayein. Kathor peela starch crown se tip ki taraf badhta hai, line ke neeche dudhiya taral hota hai. Dekhein line kahan hai.
- Jab daane me dent aa jaye to har do-teen din me dobara dekhein, kyunki sab tezi se badalta hai: Wiersma ke data me 1/2 milkline se no milkline tak poore paudhe ka DM lagbhag 0.58 percentage point prati din badha, aur paala (frost) padne ke baad lagbhag 1.07 prati din.
- Chopper bulane se pehle asli DM test se pakka karein (agla box).
Farm par dry matter kaise naapein
Practical salah: poore paudhe ka ek mutthi chop lein, kitchen scale par lagbhag 100 g tolein, microwave me chhote-chhote round me sukhayein (har baar hilayein aur dobara tolein) jab tak wazan girna band na ho, aur sukha wazan ko geele wazan se bhaag dein. Sample kai jagah ke paudhon ka mixed ho, ek cob ka nahi. Saste pre-check ke liye hand-squeeze test: chop ko mutthi me dabayein, agar paani dhaar bankar nikle to bahut geela, agar mutthi khulne par chop wapas phoolta hai aur haath halka geela hai to paas hai, aur agar sookhe sa bikhar jaye to bahut sukha. Isse sirf ye tay karein ki proper DM sample kab lena hai.
In limit ki wajah? Borreani aur saathiyon (2018) aur Wiersma ke mutabik 30 percent DM se kam par silage banane se kharab fermentation aur seepage hota hai, aur 35 percent DM se upar zyadatar seepage nahi hota, jabki lagbhag 50 percent DM se sukhe chaare me garmi se nuksan aur fafoondi ka khatra. Kung aur saathi batate hain ki DM 40 se 45 percent ke upar silage pH phir badhne lagta hai, aur sukhe silage zyada porous hote hain aur hawa lagte hi jaldi kharab ho jaate hain.
Garmi me makka silage: tropics ke liye khaas baatein
Zyadatar silage research thande mulkon ki hai. Khan study (BMC Plant Biology, 2024) isliye kaam ki hai ki wo tropics ki garmi me hui, jahan taapman 40 se 45 degree Celsius tak jaata hai. Kya mila:
- Fasal 25 se 35 percent whole-crop DM tak pakti gayi to dry matter yield 10.4 se 17.8 ton/ha, starch 29.1 se 35.0 percent badha, NDF 48.8 se 38.5 percent gira aur silage pH 4.10 se 3.60 hua.
- Lekhak 30 se 35 percent whole-crop DM par katne ko kehte hain, jo unke trial me lagbhag flowering ke 34 se 41 din baad tha. Ye din sirf unki hybrid aur season ke hain; aapke khet me calendar nahi, milkline aur DM test dekhein.
- Unhone ye bhi likha ki poori maturity se pehle silage banane se digestibility badh sakti hai par DM aur effluent ka nuksan zyada hota hai aur fermentation kam sthir rehta hai.
Borreani aur saathi jodte hain ki katai ke waqt zyada taapman aur geeli halat silo seal hone se pehle hi DM loss badha deti hai (tropics me 40 degree Celsius tak ka zikr), aur der se seal karna ya garmi me bharna zyada risky hai. Garmi ke practical niyam (hamari salah):
- Ho sake to thandi ghadiyon me chop karein, aur pehla load pahunchne se pehle sab taiyaar rakhein.
- Dopahar me ruk na jayein: 40 degree me aadha bhara khula pit tezi se garam hota hai.
- Barish ke turant baad geeli fasal na kaatein agar ek din ruk sakte hain, kyunki sataha ka paani DM kam kar deta hai.
- Pit ka size aisa rakhein ki kholne par face jaldi aage badhe (neeche bunker, bag, pit section dekhein).
Chop length aur kernel processing
Chop kyon? Chop karne se sugar nikalti hai, pack kasa banta hai aur hawa nikalti hai. Moti, bulky chop hawa pakadti hai aur khali jagah me yeast aur fafoondi chadhti hai. Kung aur saathi batate hain ki chhota chop aur mechanical processing, khaaskar sukhi fasal me, packing density badhane me madad karte hain.
Kitni lambai? Har farm ke liye ek number nahi hai. Cow ko khilane wali research me lagbhag 4 se 19 mm theoretical length of cut ki tulna hui; America me kernel processor wale harvester ke saath aam taur par 19 se 26 mm chalta hai (Grant aur Ferraretto 2018). Khan ki laboratory me fasal 0.5 se 1 cm chop ki gayi. Lagbhag 10 se 11 mm se lambe tukde cow ko chabane-nigalne me zyada waqt lete hain, aur moti chop se pashu manger par ration chhaantne lagta hai.
Bharat ke liye practical salah: forage harvester ya achha chaff cutter, jo lagbhag 1 se 2 cm ke tukde de (upar ki research ke beech ki range), cob aur daana kata ya toota hua, ek theek target hai. Load se mutthi uthakar dabayein: poora daana nahi dikhna chahiye aur angootha se lambe tane ke tukde nahi.
Kernel processing. Poora daana, khaaskar zyada pakke makke ka, pashu se bina pache nikal sakta hai. Grant aur Ferraretto (2018) ek aisi study ka zikr karte hain jisme usi cut length par processed corn silage me unprocessed se zyada DM intake mila. Agar processing harvester ka roller hai to daana toden; chaff cutter me baarik cut aur fasal ko zyada sukha na hone dena hi upay hai. Sabse achhi jaanch gobar hai: gobar me poora daana dikhe to processing ya maturity theek karein. Smell, colour aur pH se silage kaise parkhein, ye silage quality check guide me hai.
Filling aur packing: density jo nuksan tay karti hai
Oxygen dushman hai. Shuru me kata hua paudha jinda rehta hai aur saans leta hai, oxygen kharch karta hai aur garmi banata hai; Borreani aur saathi batate hain ki 30 percent DM par respiration max ka lagbhag 70 percent aur 50 percent DM par lagbhag 30 percent hota hai. Aapka kaam hawa jaldi nikalna aur itna kasa pack banana hai ki hawa bache hi nahi.
- Tezi se, patli parat me bharein. Muck aur Holmes ne paya ki density sabse zyada is baat se judi thi ki load kitni patli parat me failaye gaye, tractor ka wazan, prati ton packing time aur DM. Har load patli parat me failayein aur agle se pehle dabayein. Practical salah: lagbhag 15 cm ki parat tractor ya paon se dabana aasan hai; moti parat me hawa chhup jaati hai.
- Wazan aur waqt se dabayein. Bhaari tractor aur kaafi chakkar tezi se zyada zaroori hain. Chhote pit ya bag me tractor na ho to log, drum ya roller se dabayein, kone aur deewar ke paas zyada.
- Delivery aur packing ka mel rakhein. Silo me zyada tezi se maal aana density kam karta hai kyunki packing peeche rah jaati hai. Pack karne ki raftaar se tez chop na karein.
- Ek se kuch din ke andar bharein aur seal karein (neeche sealing section).
| Research number | Aapke liye matlab |
|---|---|
| Bunker aur pile ke liye minimum ausat bulk density lagbhag 705 kg prati cubic metre (as-fed) (Holmes aur Muck, Borreani me) | Ek cubic metre me kam se kam lagbhag 0.7 ton chop fasal aani chahiye. 40 cubic metre ke pit me lagbhag 28 ton. |
| Density har 50 kg/m3 badhne par DM loss lagbhag 2.2 percentage point kam hua (Ruppel, Borreani me) | Achhi packing seedhe bachi fasal me wapas milti hai. |
| 30 se 40 percent DM par porosity (hawa ki jagah) kam rehti hai | Bahut sukhi fasal kitna bhi dabao porous rehti hai. |
| Garam mausam me raat bhar bina dabaye chhodne par upar ke 5 se 10 cm 45 se 60 degree Celsius tak ja sakte hain (Kung) | Usi din dabayein aur dhakein. Aadha bhara pit raat ko khula na chhodein. |
Apni density jaanchne ke liye: jo fasal gayi uska wazan (load ginein aur kuch tol lein) silo ke volume (lambai x chaudai x ausat unchai) se bhaag dein. Agar 0.7 ton prati cubic metre se kaafi kam aaye to agli baar zyada dabayein.
Silage ko dhakna aur seal karna
Kai farms me upar aur kinaare yahin kharab hote hain. Borreani aur saathi dikhate hain ki bina cover ke upar ke aadhe metre me nuksan bada hota hai, aur plastic ke neeche bhi upar ke 25 cm me aksar loss zyada milta hai. Unke batayi ek study me ration DM ka sirf 5 percent bhi kharab silage hone par poore ration ka intake aur digestibility gira. Plastic aur sealing ke step:
- Jaldi seal karein. Kam density wale makka silage me seal 4 din late karne se laboratory study me DM loss 11 percent tak gaya, aur farm-scale study me ek din ki der se upar ke 45 cm me organic matter loss 27.2 percent badha. Lagbhag 3 ghante ki chhoti der me koi nuksan nahi dikha.
- Sahi silage plastic lein, patli ya chhed wali sheet nahi. Oxygen barrier film ab milti hai aur plain polyethylene se behtar kaam karti hai; supplier se poochhein.
- Plastic ke neeche se hawa nikalein. Plastic ko sataha par dabayein taaki hawa ke pocket na rahein.
- Joint kam se kam 1.2 m overlap karein aur achhe se wazan rakhein (Bolsen, Borreani me).
- Cover par ek jaisa aur bhaari wazan rakhein: tyre ek-doosre se lage hue, ret ya mitti ki bori ghani, taaki hawa plastic ke neeche “pump” na ho. Kinaare aur deewar ke paas ke shoulders par khaas dhyan, wahan silage sabse porous hoti hai.
- Plastic ko bachayein. Pashu, kutte, pakshi aur choohe door rakhein, har hafte jaanchein. Chhed ho to sahi tape se patch karein. Choohe aur chhed upar ki kharabi ka bada chhupa karan hain (practical salah).
- Barish ka paani nikalein. Sataha me dhalan rakhein aur plastic silo ke kinaare se bahar tak rakhein taaki paani neeche na ghuse.
Fermentation ke phases: andar kya hota hai
Silo seal hone ke baad ka samay-chart neeche hai. Din research ke hisaab se hain; garam Indian farm par har phase aksar tezi se chalta hai, isliye ise margdarshak maanein.
| Phase | Lagbhag kab | Kya hota hai |
|---|---|---|
| 1. Respiration | Pehle kuch ghante se kuch din | Paudhe ki cells aur aerobic microbes fansi hawa kharch karte hain aur garmi dete hain. Achhi packing aur turant seal ise chhota rakhte hain. Achhi tarah dabane aur turant seal karne par core ka taapman bharte waqt ke taapman se lagbhag 5 se 8 degree Celsius se zyada nahi badhna chahiye (Kung). |
| 2. Active fermentation | Din se kuch hafte | Lactic acid bacteria sugar ko lactic acid aur thoda acetic acid me badalte hain. pH girta hai. Makka silage lagbhag pH 3.7 se 4.0 par rukta hai, lactic acid aksar DM ka 2 se 4 percent. |
| 3. Stable storage | pH gir jaane ke baad | Jab tak hawa band hai acid silage ko sthir rakhta hai. Fermentation phase 7 se 45 din maana jaata hai, par Kung aur saathi batate hain ki poore makke ke paudhe me fermentation bahut der tak chalta rehta hai. |
| 4. Starch ka pakna | Hafte se mahine | Storage ke saath starch zyada digestible hota hai: research me ruminal in vitro starch digestibility 45 din me lagbhag 5 se 10 percentage unit badhi aur 45 se 120 din ke beech phir utni hi, aur max lagbhag 9 mahine ke aaspaas ho sakta hai. |
| 5. Feed-out | Jab aap kholte hain | Face par hawa ghusti hai. Yeast shuru hoti hai, silage garam hokar kharab hoti hai jab tak face kaafi tezi se hata na liya jaye. |
Chauthi row isliye hai ki chaara kam hone par bhi hum din 10 par pit kholne ki salah nahi dete. Detail me silage kab kholein wale article me padhein.
Bunker, bag ya pit: Indian farm ke liye kya sahi
Teeno kaam karte hain agar DM sahi ho, chop ho, kasa pack ho aur seal ho. Chunav zyadatar herd ke size, budget aur face kitni tezi se khatam karenge, us par hai. Research ek zaroori nirdesh deti hai: kholne ke baad face me hawa ghusti hai, isliye face kharabi se tez aage badhna chahiye. Borreani aur Tabacco ka northern Italy ka kaam makka silage ke liye sardi me lagbhag 1.10 metre prati hafta aur garmi me 1.75 metre prati hafta se zyada minimum feed-out rate sujhata hai, aur Holmes aur Muck face loss 3 percent se neeche rakhne ke liye feed-out rate aur density jodte hain. Ye Italy ka nirdesh hai, Bharat ka nahi, isliye hum ise sirf disha ki tarah lete hain: jitni garmi, utna tez face.
| Type | Kiske liye sahi | Fayde | Dhyan rakhein |
|---|---|---|---|
| Bunker (deewar wala, upar se khula) | Bade herd aur TMR farm | Bada volume, tractor se packing, bharna aur nikalna aasan | Har hafte bada face hatana; shoulder ki kharabi; plastic aur tyre ka kharch |
| Silage bag | Madhyam herd, machine malik se custom service | Chhota face, nirman nahi; hilana aasan | Choohe aur kutton se chhed; bagging machine chahiye; plastic ka kharch |
| Trench ya pit (plastic lined) | Chhote aur madhyam farm | Sasta; herd ke hisaab se size; paon se dabana chalta hai | Barsaat me paani; unchi zameen aur nikaasi chahiye; khodte waqt dhansne ka khatra |
| Drum aur chhote bag (practical salah) | 1 se 3 pashu wale ghar | Bahut chhota face; kam kharch me seekhna | Dabana aur seal dhyan se; prati kg laagat zyada |
Silo ka size herd ke hisaab se rakhein, khet ke hisaab se nahi
Ek aasan tareeka (hamara practical hisaab, upar ki 0.7 ton prati cubic metre density par). Sirf udaharan: apne number lagayein.
- Tay karein kitne pashu silage khayenge aur prati pashu roz kitna kg (silage feeding management guide dekhein). Maan lein 10 cow x 15 kg = 150 kg roz.
- Jitne din khilana hai utne se guna karein. 150 kg x 180 din = 27,000 kg, yani 27 ton.
- 0.7 ton prati cubic metre se bhaag dein. 27 / 0.7 = lagbhag 39 cubic metre pit volume.
- Face dekhein. Hafte ka use = 150 kg x 7 = 1,050 kg, yani 1.5 cubic metre. Garmi me face ko lagbhag 1.75 metre prati hafta aage badhane ke liye face ka kshetrafal lagbhag 1.5 / 1.75 = 0.86 vargmetre se zyada nahi hona chahiye. Isliye patla, gehra pit (jaise lagbhag 1 m chauda aur 0.9 m face unchai) ya chhota bag theek hai; chauda bunker bahut dheere chalega.
Chhote farm ka sabak: patla face chunein, aur zaroorat ho to ek bade pit ki jagah do chhote pit banayein aur ek ke baad ek kholein.
21 se 30 din ki shuruaati checklist
| Kab | Kya karein |
|---|---|
| Din -30 se -21 | Hybrid aur buwai ki tareekh tay karein. Silo ka type aur size tay karein. Pit ya bunker ki jagah taiyaar karein: unchi zameen, nikaasi, chikni deewar. Chopper book karein ya chaff cutter, blade aur bijli ya diesel pakka karein. |
| Din -21 se -7 | Silage plastic (overlap ke liye zyada), tyre ya ret ki bori, tape aur aapatkal ke liye tarpaulin kharidein. Mazdoor aur tractor ya dabane wali team ka intezam karein. Pit ko line karein aur deewarein jaanchein. Daane me dent aate hi milkline dekhna shuru karein. |
| Din -7 se -2 | Har 2-3 din milkline dekhein. DM sample lein. Katai ki tareekh lagbhag 30 se 35 percent DM par rakhein. Mausam dekhein: barish ke purvanuman me na kaatein. Cutter ki sarvicing aur dhaar karein. |
| Din -1 | Pit saaf karein. Plastic bichayein. Sabko bulakar likh lein kaun kya karega: katai, dhulai, failana, dabana, dhakna. |
| Din 0 (bharna) | Sahi lambai me chop, daana toota hua. Patli parat me failayein, har parat kasa dabayein, kone aur deewar par dhyan. Load aur samay ka record rakhein. |
| Din 0 se 1 (seal) | Deewar se upar halke gumbad ki tarah bharein, hawa dabakar nikalein, plastic modein, joint overlap karein, poore cover par wazan rakhein, pehle kinare. Ho sake to usi din. |
| Din 2 se 7 | Chhed, choohe ka nuksan aur dhansne ki jaanch karein. Turant patch karein. Pashu aur bachchon ko door rakhein. |
| Din 7 se 21 | Har hafte nirikshan. Kholein nahi. Silo apne aap baith jayega. |
| Din 21 se 30 | Zyadatar silo me pehla fermentation poora ho chuka hota hai, par starch samay ke saath aur behtar hota hai (phases table dekhein). Kholna hi pade to sabse chhota face kholein, roz taaza parat nikalein aur dobara dhak dein. Smell aur colour khatti-meethi ho, sadi ya fafoondi nahi. |
Aam galtiyan aur unka upay
| Galti | Kya hota hai | Upay |
|---|---|---|
| Bahut jaldi katai (dudhiya, hari) | Paani wali silage, seepage, khatti ya butyric badboo, yield aur starch kam | 1/2 milkline aur 30 se 35 percent DM ka intezar karein |
| Bahut der se katai (sukha, kathor cob) | Pack mushkil, garmi, fafoondi, kam digestibility, gobar me poora daana | 1/2 milkline par shuru, 3/4 milkline tak khatam |
| Moti chop, daana toota nahi | Hawa ke pocket, chhaantna, na pacha daana | Baarik chop, toota daana, gobar jaanchein |
| Moti parat, tractor nahi ya kam packing | Kam density, zyada loss | Patli parat, zyada wazan aur samay, lakshya lagbhag 0.7 ton prati cubic metre |
| Kai din tak khula pit bharna | Garmi aur upar ki kharabi | Ek-do din me bharein; poora na ho to roz raat ko dhak dein |
| Der se ya dheela seal | Upar aur kinaaron par bada nuksan | Usi din seal, overlap, wazan |
| Barish ka paani ghusna | Geeli kharab jagah aur rissan | Dhalan, nikaasi, plastic deewar se bahar tak |
| Herd ke liye bahut bada pit | Face dheere chalta hai, garmi me kharabi | Patla face; do silo me baant dein |
| Jaldi kholna | Kam starch digestibility, asthir face | Zyada samay rakhein; kab kholein guide padhein |
Laagat ka hisaab: makka silage ka fayda hai?
Hum silage ka ek kg ka daam nahi bataate, kyunki laagat zila aur machine ke maalik par badalti hai. Apne farm ke liye ye frame use karein:
- Kharch jodein: beej, khaad, sinchai, zameen, harvester ya chaff cutter kiraya, mazdoori, diesel, plastic, tyre ya ret bori, aur pit ya bunker ka hissa.
- Jitni silage asal me khilayi gayi uske tonnage se bhaag dein, jitni daali utni se nahi. Research dikhati hai ki nuksan asli hai: Borreani aur saathiyon ke batayi ek trial me bade cereal piles me kachchi fasal ki silage me lagbhag 9.7 percent nuksan hua jabki pakki fasal me 4.5 percent, aur bina cover wali silage me bahut zyada.
- Apne vikalp se tulna karein: kami ke mahino me kharide hare chaare ka daam, ya doodh sthir rakhne ke liye zyada concentrate ka kharch.
- Achhi practice ki keemat tay karein. Zyada plastic, kuch ghante zyada packing aur DM test ka kharch kharab upari parat ya aise pit se bahut kam hai jise gaay nahi khati.
Silage pit tab paisa wasool karta hai jab aapke paas niyamit herd ho, chaare ki kami ho jise aap abhi kharidkar poora karte hain, aur upar ke step follow karne ka anushasan ho. Kuch pashuon ke liye chhota bag ya pit bade bunker se samajhdari hai.
Silage khilane wali gaay ke liye ration me kya jodein
Silage ban gayi to agla kaam use achhe se khilana hai. Makka silage khatti hoti hai aur digestible starch se bharpoor, aur zyada daane ke saath khilane par rumen ka pH gir sakta hai, jo patle gobar, fat% girne aur dheere khane me dikhta hai. Silage har mineral aur vitamin bhi poora nahi deti. Neeche IMN Pyrophos ke do products hain jo silage wale ration me dairy farmers aksar use karte hain. Dono me se koi silage additive ya inoculant nahi hai: ye pashu ko khilaye jaate hain, pit me silage ko banate ya sudharte nahi. Silage ki quality upar ke steps se aati hai.
Rumenia dairy feed premix hai jisme trace minerals, rumen buffer, prebiotics, yeast extracts, probiotics aur toxin binders hain. Jin herd me silage ke saath zyada daana hai, wahan ye rumen stability aur fermentation ko sahara dene ke liye use hota hai. Ye concentrate ya TMR me 2.5 se 3 kg prati ton feed (2.5 se 3 g prati kg feed) milaya jaata hai, yani 5 kg feed khane wali gaay ko 12.5 se 15 g roz. 25 kg pack ke daam par ye lagbhag Rs 2.8 se Rs 3.4 prati pashu prati din aata hai. Mixing aur 30 din ke trial plan ke liye hamara dairy feed premix guide dekhein.
Dairy feed premix · bestseller
Rumenia
Trace minerals, rumen buffer, prebiotics, yeast extracts, probiotics, toxin binders, calcium aur phosphorus wala dairy feed premix. Rumen ka kaam, microbes ki sthirta aur fermentation badhata hai, jisse urja aur protein ka sanshleshan badhta hai.
Matra: 2.5-3 kg prati ton feed (2.5-3 g prati kg feed).
5 kg ₹1,400 · 25 kg ₹5,625MRP ₹1,800 / ₹7,500
Pyrosach rumen-adapted live yeast hai (Saccharomyces cerevisiae, 10 billion CFU prati gram). Ye rumen health aur fibre digestion me madad karta hai, patle gobar me sahara deta hai aur doodh, fat aur SNF ko support karta hai. Matra adult cow ya buffalo ko 8 se 10 g roz hai, feed me milakar raat bhar bhigo dein. Jahan silage ya zyada starch wale ration se gobar bigadta hai wahan ye kaam aata hai. 1 kg ke daam par ye lagbhag Rs 5.6 se Rs 7 prati pashu prati din aata hai.
Rumen ki sehat
Pyrosach
Rumen ke anukool Saccharomyces cerevisiae (1000 crore CFU prati gram). Reshe ka pachan aur rumen ki sehat sudharta hai, patla gobar ghatata hai, doodh, fat aur SNF me sahayak.
Matra: 8–10 g prati vayask gaay ya bhains prati din, ya 200–300 g prati quintal daana. Achhe natije ke liye daane me mila kar raat bhar bhigoiye.
1 kg ₹700MRP ₹1,200
Bina salah ke products ko ek ke upar ek na jodein: pehle apna ration WhatsApp par bhejein. Milk fat ke liye Acetomax aur milk fat guide dekhein. Byaane se pehle ke samay ke liye negative DCAD premix guide dekhein. Sardi me bhains ke ration ke liye bhains ka doodh sardi me kaise badhayein padhein. Aur silage ke liye bacteria ya enzyme products ke baare me soch rahe hon to silage additives aur inoculants: kaam karte hain ya nahi? padhein.
Makka silage ke myths aur facts
- Myth: cob me jitna zyada daana, utni achhi silage, isliye paudha sukhne tak ruko. Fact: yield 1/2 milkline ke aaspaas peak hoti hai aur poore paudhe ka DM 30 se 40 percent par best hai. Der wali makka sukhi, pack karne me mushkil aur jaldi kharab hoti hai.
- Myth: koi bhi hari makka silage ban sakti hai. Fact: lagbhag 30 percent DM se kam fasal kharab ferment hoti hai aur bahne lagti hai, aur 50 percent DM se upar garam aur fafoondi wali ho sakti hai.
- Myth: bada pit behtar hai. Fact: herd ki zaroorat se bada pit matlab dheera face, aur dheere face garmi me kharab hote hain.
- Myth: silage plastic bas barish rokne ki chaadar hai. Fact: wo oxygen ki deewar hai. Joint, kinaare aur wazan film jitne hi zaroori hain.
- Myth: dus din baad pit khol sakte hain. Fact: khol sakte hain, par starch digestibility mahino tak badhti rehti hai.
- Myth: koi rumen product kharab silage theek kar deta hai. Fact: pashu ko khilaya gaya kuch bhi galat bani silage ko theek nahi karta. Pehle steps sudharein.
- Myth: tez khatti smell matlab silage kharab. Fact: achhi makka silage ki smell tez khatti ya meethi-khatti hoti hai. Sadi makkhan, ammonia ya fafoondi jaisi badboo samasya ke sanket hain.
Aksar poochhe jaane wale sawal
Chhote farm par ghar me makka silage kaise banaye?
Silage wali makka ugayein, lagbhag 1/2 milkline aur 30 se 35 percent DM par kaatein, daana toote aisa baarik chop karein, plastic lage pit ya bag me patli parat me dabayein, usi din airtight plastic se seal karein aur cover par wazan rakhein. Kai hafte band rakhein. Pit ka size herd ke hisaab se rakhein taaki face tez chale.
Silage ke liye makka katne ka best stage kaun sa hai?
Research 1/2 se 3/4 kernel milkline ke beech katne ko support karti hai, jab poore paudhe ka dry matter lagbhag 30 se 35 percent (40 percent tak) hota hai. Is waqt yield max ke paas aur digestibility achhi hoti hai.
Laboratory ke bina dry matter kaise pata karein?
Microwave method: chop sample tolein, chhote round me sukhayein jab tak wazan girna band ho, sukha wazan ko geele se bhaag dein. Hand-squeeze test sirf mota pre-check hai. Test khet ki kai jagah ke mixed sample par karein.
Makka silage ke liye kitni chop length theek hai?
Research me lagbhag 4 se 19 mm ki tulna hui. Bharat ke farms ke liye hum daana toote hue lagbhag 1 se 2 cm sujhate hain. Baarik chop, khaaskar sukhi fasal me, behtar pack hota hai; bahut moti chop me pashu chhaantta hai aur pit me hawa rehti hai.
Makka silage ko ferment hone me kitna samay lagta hai?
Mukhya fermentation din se kuch hafte me hota hai, aur fermentation phase 7 se 45 din maana jaata hai. Fermentation aur starch digestibility mahino tak sudharte rehte hain. Silage kab kholein guide dekhein.
Pit ko kitna kasa dabayein?
Borreani me di Holmes aur Muck guideline ke mutabik bunker aur pile me kam se kam lagbhag 705 kg fasal prati cubic metre. Patli parat, jitna bhaari tractor mile, aur zyada samay. Chhote pit me log ya roller se, khaaskar kinaare.
Kya pit me namak, gud, urea ya kuch aur daal sakte hain?
Makka me aksar apni sugar kaafi hoti hai, aur koi additive achhi packing ki jagah nahi leta. Inoculant kab evidence ke saath kaam karta hai, ye silage additives aur inoculants article me hai.
10 gaay ke liye bunker, bag ya pit: kaun sasta hai?
Chhote herd ke liye patle face wala lined pit ya silage bag aksar sabse samajhdar hai. Bade bunker ka face roz ke use ke hisaab se bahut chauda hota hai aur garmi me uski quality girti hai.
Meri makka silage garam, badboodar ya fafoondi wali kyon hai?
Sabse aam karan: der se seal, dheeli packing, plastic me chhed, bahut sukhi katai, ya kholne ke baad face ka dheere chalna. Silage quality check guide padhkar samasya pehchanein.
Silage ke saath doodh aur rumen support ke liye kya khila sakte hain?
Ye silage ko nahi badalte, par use khane wali gaay ko sahara dete hain. Rumenia (dairy feed premix) aur Pyrosach (live yeast) IMN Pyrophos ke do vikalp hain. Apne ration ki jaankari WhatsApp +91 98715 84101 par bhejein, hamari team salah degi.
Nishkarsh: makka silage aisi banayein jo khilane ka mann kare
Makka silage kaise banaye, sankshep me: sahi hybrid aur samajhdar paudha population, lagbhag 30 se 35 percent whole-plant DM (1/2 se 3/4 milkline) par katai, daana toota baarik chop, patli parat me kam se kam lagbhag 0.7 ton prati cubic metre dabana, usi din seal aur cover par achha wazan, silo ka size aisa ki face tez chale, aur kholne se pehle intezar. Phir ise aise ration ke saath khilayein jisme protein, mineral aur vitamin bhi poore hon. Is season ek chhota pit shuru karein, har step likhein aur agle saal sudharein.
Sources (research, jahan se numbers liye gaye):
Wiersma DW et al. 1993. Kernel milkline stage and corn forage yield, quality and dry matter content. J Prod Agric 6:94-99. | Khan N et al. 2024. Influence of maize genotypes and harvest stages on in-silo fermentation quality and nutritional value of corn silage during hot summer condition of the tropics. BMC Plant Biology 24:490. | Ferreira G et al. 2014. Effect of planting density on nutritional quality of green-chopped corn for silage. J Dairy Sci 97:5918-5921. | Borreani G et al. 2018. Silage review: Factors affecting dry matter and quality losses in silages. J Dairy Sci 101:3952-3979. | Kung L Jr et al. 2018. Silage review: Interpretation of chemical, microbial, and organoleptic components of silages. J Dairy Sci 101:4020-4033. | Grant RJ aur Ferraretto LF 2018. Silage review: Silage feeding management. J Dairy Sci 101:4111-4121. Bunker, bag aur pit ki tulna, chaff cutter ke liye chop length, parat ki motai, silo sizing ka udaharan aur garmi ke niyam practical salah hain, research nahi.
Ye bhi padhein: Silage quality check · Silage losses · Silage additives · Silage kab kholein · Silage feeding management · Makka silage ke saath ration balance · Dairy feed premix · IMN product guide